|
|
|
|
|
|
|
|
|
|
|
Sequence Of Finishing Steps Sand/prep Dye or stain Seal grain if desired Top coat (lacquer, poly, oil) Wax Preparing New Shells killer_deep: Do Keller shells need any preparation before the first coat of Tung oil goes on; sanding, or anything of the sort? JLee: I would sand the shells first with 220 (lightly, to get rid of any stains or rough spots. Then follow with a thorough sanding with 400 grit. This goes for both inside and out. shiloh: As mentioned before sand your drum shells inside and out to at least 400 grit, if using oil I go to 600 on the outside. Preparing Old Shells elliotiscool: So I am experimenting around with my old kit and removed the cover from my floor tom. I got it off but there is still plenty of glue on the wood of the shell. Is there anything around the house I can use to take it off...or anything I should buy? rhjanes: Goo-Off from a paint store (Home Depot / Lowes). However, my favorite is 3M brand adhesive remover. Probably get it at NAPA or an automotive paint supply store. I've also seen it at an O'Reillys. Comes in a quart can, and also a spray on. I use the quart and an old-rag. Six-Ply: The Goo Gone and a credit card DID work pretty good. I started with a razor blade but didn't want to dig into the shell. Would the lacquer thinner be a better choice over Goo Gone? rhjanes: I'd only do lacquer thinner as a last resort. I'd do the 3M Adhesive stuff. Lacquer can cause the wood to delaminate the plys. TimWms: I am going to refinish a Yamaha Stage Custom Standard drum set. It has the natural color with a matte finish. What would be the best way to get the finish off so that I can apply a dye stain to the shells? Do they just need to be sanded down, or should a chemical stripper be used? painter213: Just use a Solvent Base Chemical Stripper. Home Depot and Lowes have some good ones. Make sure that you use Chemical Gloves and Eye Protection. Strip small areas to keep it more manageable. Once you are satisfied with the results of the stripper, then clean the shell with mineral spirits to remove excess stripper. Make sure that you wipe the shells down good to remove any stripper left. Once the shell is dry, run over the shell with an orbital sander with 150 grit paper to remove any areas that were not removed by the stripper. Then sand over the entire area of the shell to make the appearance more uniform. Then move up to 220 grit paper and sand over the entire shell again to smooth up nice. jamus: Hi everybody, a buddy of mine has a five piece Sonor kit with a nice sunburst satin finish, he got a deal on it at a music store, however the kit has silver puffy stickers for badges... how can I safely remove the stickers without damaging the finish? rhjanes: Take one down to an Auto Body paint suppy store, or your local NAPA. They make a decal removal chemical. Heat gun might also work. If there is some sticky left over, and this might also work on removal, 3M makes some "sticky gunk remover". It actually neutralizes the glue and the sticker/decal, will just slide off. I've never had it harm a surface (no guaruntees!) PDGood: I'd be careful with that heat gun...it works a little too well. It can and will melt anything nearby including the finish itself and plastic washers. I'd try the chemical method first. In the graphics business we run into this quite often - removing a sticky substance from film (plastic). Film "stop" works well for this (used in film developing to stop the development) but it's becoming harder to find since less people use film in photography. OPFOR: Try a product called 'Goof Off.' You can get it at Lowe's and it does a great job of removing adhesives without harming finishes. I would recommend trying it in a small area first, just in case. rhjanes: You tried the goof-off? I thought that was a paint "oops" remover (very mild). I'd start with the adhesive remover first. You can always work up to a more "drastic" chemical.....but not the other way!!!! fienddrummer: I use Ronson Oil lighter fluid. It's cheap and will bring stickers off glass and metal (Like those ugly "WorldMax" stickers on their DSS mounts). Never tried it on a finished drum though...shouldn't hurt....I wouldn't think. Stripping old paint with eco friendly paint stripping products: from: The Green Guide http://www.thegreenguide.com/doc/ask/paintstrippers To take on hardened paints and varnishes, paint strippers need powerful ingredients, many of which are hazardous to our health and the environment. Most paint strippers on the market contain a nasty ingredient called methylene chloride, also called dichloromethane, which is an impressive stripping solvent but also a serious health hazard. In the short term, inhalation of fumes from methylene chloride can cause dizziness, nausea, numbness of fingers and toes, eye irritation and impaired hand-eye coordination. A splash of this stuff on bare skin will cause skin irritation and even burns. Long-term, high-level exposure can cause heart and respiratory problems, damage to the central nervous system and may increase the risk of cancer. In addition, petroleum-based paint strippers produce harmful volatile organic compounds (VOCs), which provoke respiratory problems and contribute to smog formation. Fortunately, there are manufacturers who make methylene chloride-free strippers, such as: Bio Wash: http://abm-solutions.net/html/bio-wash.html 3m Safest Stripper: http://solutions.3m.com/wps/portal/3M/en_US/Marine/Home/Products/Catalog/?PC_7_RJH9U5230GE3E02LECIE20S4K7_nid=5KGN8BP4PQbe1B4G7J2TCHgl Ready-Strip Pro: http://www.readystripsales.com/Ready_Strip_Pro_s/2.htm Citrus Strip: http://www.perk-products.com/pages/cp390.htm If you can't find a methylene chloride free stripper at your local hardware or home improvement store (Most Home Depot's carry Citrus Strip) you can purchase Bio Wash and 3m Safest Stripper online at www.environmentalhomecenter.com and Ready-Strip Pro at www.readystripsales.com. Do be aware, however, that these products may contain other potentially harmful ingredients. For example, Ready-Strip Pro contains N.Methyl-2 Pyrrolidone (NMP), a known eye irritant, and Bio-Wash contains sodium hydroxide, or lye, which can irritate your skin, eyes and respiratory tract. Test for Lead Before you begin your project, it's a good idea to test your bookcase for lead paint, especially if the item was painted before 1980. You can purchase a lead paint testing kit at most hardware stores. If you find that the paint does contain lead, it's best to have a certified lead specialist do the stripping for you. See "Testing for Lead in Peeling Paint," at www.thegreenguide.com/doc.mhtml?i=109&s=lead. Precautions Read all directions and warnings for whichever stripper you choose before using, and wear appropriate safety gear such as goggles, gloves and masks. This kind of job should be done out of doors, in a designated area away from children and pregnant women. If your project involves any sanding, the dust may contain harmful paint residues. Again, wear a mask and goggles to avoid inhalation and to keep the dust out of your eyes. Because harmful gasses and residues may linger in indoor spaces long after you are finished, ventilate your workspace well before you start and damp mop all nearby surfaces when you're done. Never use flammable paint strippers near any source of high heat, sparks of flame. Heat Guns It is possible to avoid chemical strippers altogether, using a heat gun to soften the paint instead. This approach takes a bit of skill and really works best on flat surfaces with thick layers of paint. It's important to keep the gun gently moving, covering small spaces at a time. Holding the gun steady for too long can burn the wood. Due to the risk of burning yourself, never direct the heat anywhere away from the areas you're stripping. Heat can also easily ignite loose sawdust, newspaper and clothing and even shatter your windows. Keep a bucket of water or a AB-rated fire extinguisher nearby to safeguard against possible fires, and arm yourself with goggles and heavy gloves. Toxic fumes can release from softening paint, whether a chemical or paint is doing the softening, so ventilate your workspace well and never use a heat gun on lead-based paint. Often a combination of heat and chemicals are used to strip paint. If you decide to use both methods, always use your heat gun first. Applying heat to areas treated with chemical strippers can vaporize or ignite the chemical residue. Disposal Whichever stripping method you choose, check local hazardous waste guidelines, and know ahead of time how you will dispose of waste such as dust, paint chips, leftover paint stripper and any cleaning materials used to rinse off stripped surfaces. The chips from lead-based paint will always need to be disposed of as hazardous waste, but often paint chips containing other heavy metals such as cadmium, chromium and mercury will as well. If the type of paint you're stripping and its ingredients are unknown, it might be safest to go ahead and dispose of the paint chips as hazardous waste. Another eco friendly stripper that has received good reviews: Brand: Rock Product: EasyStrip Description: Fast-Acting environmentally safer water-based remover strips 3-4 layers of paint and stains safely, quickly and economically. Product changes color when stripping action is completed. Strippers that contain methylene chloride are classic stripping products that will remove paint through the use of harsher chemical compounds. They need to be used with particular care to safeguard humans, animals and the environment. Rock Miracle Safer Strippers are especially formulated to be safer for the environment and to those using them. ...Rock Miracle Safer Strippers are non-caustic, non-flammable, contain no methylene chloride, alkalines or methanol, and are a much better and safer alternative when safety and environmental issues are at stake. This is another brand of stripper with an evaporation retarder: Bix Stripper is a flammable, water-soluble, brush on paint remover. This product is specially designed to retard evaporation, which reduces work place exposure and improves performance. This important feature allows the active ingredients to be encapsulated under a product film, which in turn keeps the paint remover wet and keeps it working much longer than comparable products. After most of the coating has been scraped off, the remaining residue stays wet, allowing more time for final clean up. Vapor emissions are substantially reduced making for a safer work environment. Bix Stripper may be brushed, poured or rolled. The product contains a thickening agent, which enhances vertical cling. It is specially formulated to remove coatings such as lacquers, polyurethanes, oil and acrylic paints. Removes polyurethane varnish from hardwood floors. Removal time will depend on type and thickness of coating. In extreme cases where many coats of paint are involved, additional applications of stripper are required to totally penetrate to the bottom layer. (End of article.) PDGood: How do you physically clean up paint stripper once it's done its job? Wipe off with paper towels or some suchP If I put that in a trash bag won't it eat right through it? If I wash it off - that would be putting water on wood which would not be good. Am I making this out to be harder than it really is? sadolcourt: If your weather is good, leave the soiled paper towels outside for a day or so, letting all the solvent evaporate. Wrap it in a plastic food bag, good as done. Check out this site http://www.woodzone.com/articles/paint_stripper.htm J.Richard: OR mix it up with saw dust or cheap cat litter and let it dry or harden. Once it's dried up you can bag it and toss it away with the regular trash. rhjanes: I squeegie it off with either an old putty knife or some plastic spreaders. I smear/clean/wipe those, into old newspaper. Let dry, wad up and into the trash. votandrums: I bought a shell pack and hardware over a year ago. I dyed the shells with analine dye and put a good clear on all the shells. My question is, how do I need to prep the shell to paint over the finish? rhjanes: Depends on what the clear was that is already on. Scuff it with a 0000 steel wool or a Scot-brite deal. If you are spraying the same stuff (lacquer - lacquer.....poly over poly), etc, then you are ready. If the shells have been handled some, wipe down with some wax-grease remover. votandrums: The clear that is on them is deft gloss lacquer from rattle cans. Would denatured alcohol work as a degreaser and wax remover? rhjanes: I would think so. painter213: If I was you, I would sand all of the rattle can clear off. Especially if you are going to use any automotive paints. The Deft is real brittle. No sense in cutting a corner and then having to sand off even more products later on. I would sand down to the dye, apply a good sealer/primer, and then go from there. You're only as good as your base. rhjanes: Be very careful in sanding down to the dye. Try and stop just as you get the last of the clear off. Cleaning Shells With An Oil Finish zbert: I got a set of 9 year old drums.... Maple Keller shells that were originally oiled. Before I (re)oil them I would like to clean the shells. Any suggestions would be great. rhjanes: ...Murphy Oil Soap. MADE to clean oiled wood surfaces. Another trick is to get some straight Lemon Oil (both Murphy and Lemon oil should be in the cleaning aisle of your local grocery....Lowe's and Home Depot also stock them in their cleaning products aisle). After the Oil Soap, let dry. Apply the Lemon oil. I've even used the Lemon oil with 0000 steel wool to "polish" the oil finish. Hand Sanding rhjanes: I use the best quality paper I can find. Usually 3M. Get the Wet/or/dry type - grades from 280 to 1200 and even beyond. I always use a 3M backing pad, medium hardness, to make sure the sand paper is smooth to the shell. When sanding bare wood, or the dye, or sanding sealer, I dry sand. I only wet sand the final finish. With an 8.5 by 11 paper, I fold it to 8.5 by 5.5 and tear it in half. Each of these half-sheets can then be folded into thirds and will exactly fit the 3M sanding sponges! Look at the thread on polishing for pictures. Sandpaper yoyospam: My problem is that I can not find 1200 grit sandpaper anywhere. I have 600, 800, 1000, 1500, and 2000 grit. Will it turn out good with out the 1200 grit? Where do you guys get your sandpaper? Jarick: So long as you don't have any shiny spots in your finish, that should be fine. I get mine at auto part stores for 1000 grit and up, home depot for 800 and below. rhjanes: You could skip the 1200 with all the other grits you have. But, I get mine from auto paint supply houses. (General sandpaper info from Wood Magazine): Resin-impregnated sandpaper, in grits ranging from 320 to 2000, is available from auto-body paint and supply stores. The abrasive particles on these sandpapers are of a more uniform size than those of common woodworking sandpapers and are more securely bonded to the backing paper. This wet/dry sandpaper can be used either dry, like common woodworking sandpaper, or wet, using a rubber sanding block and solution of liquid detergent and water. Wet sanding lubricates the surface being abraded, reducing scratches. The water also carries away loose pieces of abrasive as well as finish particles and prevents the sandpaper from loading up. Wood Filler Ned Ingberman: The best wood filler we have found for drum shell repair is "Plastic Wood", a product made by DAP. With its high cellulose fiber content this wood filler is designed to stay tight. It doesn't shrink or become brittle - so it won't crack or loose its bond when the shell flexes or vibrates during tuning or playing, or when the shell expands and contracts with changing weather. When used for bearing edge repair, Plastic Wood even stands up to the intense friction and pressure produced by the drum head. The makers of this product say it "Looks and acts like real wood" and they mean it. Plastic Wood can be sanded, cut, drilled, planed, varnished, painted or lacquered. This high performance wood filler comes in a quick-drying solvent formula, and a slower drying non-toxic latex formula. We recommend the non-toxic formula. Unlike the solvent based formula, it's non-flammable, has no harmful vapor and does not require protective dust mask when being sanded. Both formulas come in assorted colors including maple and mahogany. Plastic Wood can be found in most hardware stores. For information on where to purchase Plastic Wood in your area call DAP at 888-327-8477. PDGood: I know a lot of people use a combination of wood glue and sawdust. One question - how do you get a fine paste of wood chips to mix with glue to make your filler? I haven't been able to get the sawdust fine enough and mine comes out rough. OK for filling big holes but not any good for smaller ones. mountainhick: I use wood flour, not sawdust from the shop. Wood flour is a graded very very fine wood dust. I buy it from raka.com . Look at their fillers, it is the very fine maple wood flour. If you have the right epoxy, you can also use bread flour for filling and patching jobs. sweetdrums: I use a polyester resin to fix surfboards. I have started to use it on drums as well, for filling large holes. I use a UV curing polyester resin that you apply in the shade on a sunny day. Direct sunlight on a nice day will make the resin hard in seconds. A huge advantage for getting an even finish. It sands well also (ever see a surfboard before?) The stuff cures crystal clear unless you add fillers or dyes. I can tell you that I have worked with the 2 part epoxy, as well as the 2 part polyester. I have quite a bit of experience with surfboard repair. The 2 part stuff can take a long time to cure. Even when I use more catalyst than recommended to speed up the cure on polyester it's nowhere near as fast a cure rate. I don't think I'll ever use the 2 part again. If it is sunny and warm enough, the UV curing polyester cures almost instantly. I have had no problems with any of it "running" during cure. Also, the benefits from being able to apply the resin in the shade and start the cure when you are ready (by sun exposure) is a huge benefit. I can't emphasize this enough. It gives you so much more control of the resin. There is no mixing of any kind with the UV cure. One less thing to screw up. I get mine from surf shops. If you don't have any near you, try a surfshop online or just search the web for UV resin. You should be able to find both polyester and epoxy types available. You will also find some "how to's" on youtube and such. The epoxy is supposed to be stronger, but it is harder to sand and finish. Probably overkill anyway. The polyester is very strong and sands easily. There are tints that can be added for an opaque look. They will take longer to cure though. I know you can buy the 2 part stuff at home centers. I'm not sure if they sell the UV curing type or not. Boat builders or boat dealers might have access as well. Also I believe you can add a UV stabilizer to the standard 2 part stuff as well converting it to a UV cure. But then you're mixing again. Some names from the surf industry are: ding all sun cure Solarez hippybaker: Wow, I had never seen or heard of this stuff before... It seems wonderfull... lay/pour/trowel, it on, and then play with it as long as you want, and then when your ready, zap it hard with a UV light. Do you think it needs ACTUAL sunlight, or do you think I can use the HPS light from my garden to cure it? sweetdrums: You can use a UV light, but I would assume the strength of the light would affect the cure time just like the clarity and warmth of the sun would on any given day. Weak light = slower cure. I try to do this type of work on a warm sunny day. I have one of those lights myself. I haven't tried using it to cure my resin, mostly because the fumes are toxic and I need to work outside with it. You will want the temperature to be AT LEAST 50-55 degrees. So if you have a garage to work in that is warm enough, wear a mask and give it a go. The epoxy is not as toxic I think (or maybe even non-toxic), so that might be a better solution for indoors with a light. Pain in the neck to sand though. Wood Repair - French Polishing -From an article on French polishing at http://www.milburnguitars.com/frenchpolish.html and reposted on Drumshed by ctdrum1 If, by chance, you discover a large dent or scratch that might require excessive sanding you may want to steam the defect before trying to sand it out. At the very least you will reduce the amount of sanding that would have been required. To steam out a defect, dampen the area and lay a wet cloth only on the spot that you are going to steam. With a clothes iron turned all the way up, lay the iron over the wet cloth covering the defect and hold for a few seconds. Let the area dry and a little light sanding with 220 grit dry sandpaper should do the trick. A deep nick will usually have to be filled with a dent filler such as cyanoacrylate (Superglue) or epoxy. A major nick or gap can be filled with sanding dust mixed with 5 minute epoxy. When sanded level this will make a good invisible repair. snaremaster031: Further to this post/method for removing dents from raw shells or other wood components - I have an old soldering iron that I flattened out the tip on and use for steaming. A drop of water onto the dent and sometimes using a sewing needle to poke the grain within the dent to allow the water to penetrate better; let it sit for about 20 to 30 seconds and then hit it with the soldering iron. Too much will obviously cause a burn, but only if you are really careless. This will usually pop the dent/defect right out, followed by a palm sander with 150 grit. Rarely requires more than one go around with the water and iron, and the small soldering iron takes up very little space in a drawer when not in use (and doesn't make the wife wonder what I could possibly be doing with/to her iron in the shop....) Preparing For Paint After Removing Wrap rhjanes: Shoot on a primer-sealer. Two coats. Don't sand it. Then, depends on the pores and grain showing. You might have to use a filler or primer-surfacer. About 5 coats. Sand it down, but stop before the sealer color shows up (yeah, that is hard to do!). Decide how smooth you want it. You might have to primer-surfacer, sand, a number of times. When you are happy with the surface, then DUST spray on a different color of paint. Wipe-sand it. All that Dust, should all vanish at the same time. Vanishes too quick = high area. Doesn't vanish, low area or pores or pits. Keep spraying surfacer and sanding or, like it the way it is! Then, top coat two or three colors. Then, clear it, wet sand the clear, polish, etc. Stains vs Dye From an article on Wood News Online by Alan Noel Every quarter I teach a class on coloring wood and often the very first question from the class is, "What are the differences between stains and dyes?" Very simply put, stains are very thin paints and dyes are why your socks are red out of the washer. With stains, the pigment tends to remain on the surface of the wood and lodge in the pores, while dyes penetrate deeply and color the wood from within. Dyes: Dyes are colorants that are usually mixed in an oil such as mineral spirits, or in water or alcohol as a carrier. The dyes used in woodworking are actually very similar to those used for dying cloth and other materials. Dyes are characterized as transparent, as they bring about color changes in wood without obscuring the figure. The molecular size of the dye particles is so small they allow light to pass through virtually unhindered. In my experience water-based dyes seem to be more lightfast than alcohol-based dyes, while oil-based dyes fade the fastest. I use alcohol-based dyes to make shaders by adding them to lacquer or shellac. By then gently spraying on very thin layers, I can blend unlike areas together or change the overall hue while retaining as much clarity as possible. There's nothing like the shimmer of a highly prized timber! Stains: Stains are really nothing more than very thin oil or water-based paints. Whereas dye stains are typically comprised of only dye and a carrier, stains are comprised of pigment, a carrier and a binder. Using a thin varnish (oil-based) or acrylic latex (water-based) as a binder, ground particles of natural and synthetic minerals are added to make stains. Stains should be stirred often to insure an even dispersion of pigment because the particles tend to settle on the bottom.....don't you just hate gravity?! In many of my finishing schedules I combine both stains and dyes for adding depth in carvings, hiding veneer lines and blending unlike woods together. I will say however, I can't imagine why anyone would use a pigmented stain on any highly figured wood - with more than one application, the grain will be so obscured that the piece may as well be painted. MarkleyCustom: Stains are ground-up pigments, suspended in a solvent. That pigment is the "sludge" that you stir up in the can to re-suspend it in the solvent. The pigment particles are relatively large, and they settle to the bottom of the can after a while. Stains are much more "opaque" than dyes, meaning stains will cover more of the grain with each coat, until you end up looking almost like paint. Stain pigment particles lodge in the grain and will make the wood look "muddy" if too much stain is used. (That's why you almost always wipe off the excess stain) Dyes are much, much finer particles, and usually will not settle out of the solvent. The dyes are usually very concentrated colors and are usually designed to be diluted with alcohol, water, or some other solvent to achieve the color intensity you want. Dyes are much more transparent than stains and allow more of the wood grain to show through. You can usually apply multiple coats of dye without "muddying up" the grain. Sometimes it is hard to achieve the color intensity that you want with dyes alone. Many professional finishers will use a multiple application process with both dye and stain to achieve the look they want. Unix: Another thing - you can't use alcohol dye alone because with time the color will fade and almost disappear. Here (in France) a company has developed a dye that is water based so the color doesn't fade from sun light. In furniture we use dye under standard stain to achieve more profound colors. You also have different kinds of stain like: wipe on stain, spray and wipe stain (with NGR dye included), spray stain, water based stain etc... Jbfrench75: I'm really interested in a lime green to candy black fade... any advice? Unix: The way I would do it is by spraying stain - light green and darker green in the bottom. After a sanding sealer, I would blend the 2 colors with a dark green shading (30% sealer for 70% thinner with 10% max. of stain). After that you apply whatever lustre you want. Preparing For Dye/Stain rhjanes: Most shells are sanded to about 320. I always go ahead and dry sand, with a backing pad on my paper, with 280 and 320. I then apply some water to the shell to raise the grain. Let it dry for a few hours and sand it again. You can sand to 400, but too much and you get the grain closing up which lessens the absorption of the dye. I mix my dye in old jars from the kitchen, using distilled water. I usually have taped off the outside and applied two coats of Maloof oil on the inside. Then, remove the tape. WAIT! If you do this, the tape will raise a lot of grain! So, sand again at 320 until smooth. Then, apply the dye with a sponge applicator, t-shirt strip, cheese cloth. You will probably need two coats to get it even. I often tape off the inside with blue painters tape, just to keep any dye off the inside. The dye will probably NOT absorb through the oiled inside, but just in case..... JLee: I was doing some shopping at Home Depot yesterday when I came across a product called Minwax "Pre- Stain". The description says that it is for creating a more even absorption of stain on the wood to be stained. Apparently it is water based I have no problem with adding another step to the process, but I was just wondering - does anyone actually use this and does it really do anything? crankz1: Maple has a tendency to get a little blotchy with W/B dye. This might not be a problem if you are doing a solid dark color ..... lighter colors and fades can benefit from pre-stain/dye conditioning. Being that the product is water based, you may be able to reduce it up to 50% with distiled water for deeper penetration and lighter conditioning. This will help with blotching and still allow decent dye coverage. drumfoundry.com: I've used that exact stuff and did not like it. Still find that a good sanding with 150 or so gives me a more even and deeper color. 2 applications of aniline dye stain btw. JLee: 150 grit? To prep the shell or in between coats? It would seem like prepping a shell with 150 would be a fairly rough surface to start on. I have previously gone to 400 before staining. Hope I am doing it right. drumfoundry.com: We are working on a batch of Kellers right now where there is a lot of glue bleed through. Pretty frustrating. The outer ply had some bad tearout. Rougher sanding opens up the grain more and produces a deeper color. Then we apply sanding sealer which raises the grain, then sand that smooth. Our topcoats are a high build polyester. So, it all just depends on the process. Dyeing/Staining Dimperdoo: For a first time project, try going w/ water base stain. You can find it in black (charcoal,dark gray,whatever) I really like the Minwax wipe-on poly for an easy finish coat (after the stain). If you use the wipe-on poly, you'll be best served to use a Minwax stain. In fact you may have compatibility issues w/ another type of product. (Test on scrap if you like something else for your stain) Water base is very forgiving. Get your shell wet w/ a wet cloth first (in the area you're applying the stain) then the stain (use rags to apply by hand) For a black, you would apply multiple coats to get it as dark as you want. You want longer strokes when applying, overlapping previous strokes and "feathering" the strokes together. Go for doing the whole outside of the shell in one "coat." Let dry for an hour (hot days like 80, 90 degrees, or more) or two(normal 70 degrees) between coats. If you want the staining to go faster, and are more confident in your competence, apply the stain w/o the initial water coat - it will apply much darker/but be more difficult to keep even. Feel free to keep rubbing or adding stain to get a good consistent even coverage. If it gets too dark, use a rag w/ just water to lighten it up a bit (it will only lighten it up a bit though) [sparingly, damp not dripping] Jarick: One thing you may want to try that helps with dyeing is to wet the surface, wait about 15 minutes, then sand the hairs that rise up with 220 grit sandpaper. Don't sand any higher than that. That will open up the pores of the wood and raise the grain so your wood is more uniform and reduce the fuzzy grains that pop up. The aniline dyes are recommended. stranded in daytona: I just stained the inside of my snare black... here are a few tips from my experience: First go buy some De-natured Alcohol and rub the drum with it. Don't be shy, use a lot of it and really rub it into the wood then let dry (takes about 10 mins b/c it evaporates quickly). The alcohol will actually open up the pores of the wood and allow it to soak up a lot more of the stain. I did this and got amazing results on my birch snare. Also, let the stain dry at least a day b/c black stain lightens up quite a bit after it completely dries... and yea, it will take many coats. To tone down a color that is too vivid: Yes, you can mix colors (put one on top of another). Raven Custom Drums: I use a lot of dyes on drums, and yes you can pretty much dilute dyes as much as you would like to come up with some great looking colors. phan250: If you want a muted tone, try wiping a wet rag over the shell. The water will lift out some of the dye and lighten the color. Be sure to dry the shell as you go so you don't just run the color. rhjanes: I use t-shirt strips, or cheese cloth, or a foam brush applicator to apply the dye. Two coats at least, with drying time in between. jrfrond: Coming from the guitar building and repair industry (I'm still in it, but I was doing that LONG before drums), I've learned lots of tricks that I've ported over to drum building. Finishing drums and guitars is essentially the same. Only the shape of the workpiece differs. Most guitar builders favor alcohol-based dyes. They are NGR (Non Grain-Raising) and due to the lower specific gravity of the solvent vs. water, are more readily and deeply absorbed into the wood. The main complaint is that they dry too fast and leave lap marks, a legitimate problem. If you are using a ready-made alcohol-based dye such a Behlen's Solar Lux (my personal favorite), you can purchase their own Solar-Lux Retarder to slow the drying time. This stuff works on self-mixed alcohol dyes as well, such as Colortone Concentrates available from Stewart-MacDonald Guitar Shop Supply (ironically, a great place for drumbuilders to purchase supplies from as well). These concentrates are mixed with denatured alcohol in the desired blend and concentration to achieve whatever color and saturation you require. The problem is that, even with retarder, these dyes can STILL dry to fast and become a pain. Like most dyes, they can look splotchy on maple. Here is where the advantage of using these dyes comes in: to get these dyes to absorb more evenly and increase the dry time, IN ADDITION TO THE RETARDER, add about 1oz. of ordinary Bulls Eye Clear Shellac (available everywhere) to every 4oz. of stain. The shellac gives the stain some "body", straightens out the uneven absorption problem on maple, and acts as a primary washcoat sealer, all at the same time. You cannot add shellac to a waterbased stain where, even though the drying time is longer, you still have the issue of uneven absorption on maple. When topcoating a stain prepared like this, acrylic presents no problem. If you are using nitro lacquer, you must shoot a LIGHT first coat or sanding sealer first, so that the stain coat does not dissolve and bleed into the first coat. This is really a minor issue. To me, the following of these guidelines is worth the superior results I always achieve with alcohol-based stains. -J.R. Frondelli- Frondelli USA Drums Jarick: Instead of staining the drum, you can put dye into lacquer and spray it. This is kind of like holding up a color transparency rather than trying to get the drum to accept stain. Example: http://forum.drumshed.org/showthread...t=blue+lacquer Sanding Sealers Fezzasus: There are two issues with working with wood, the first is that the wood is porous so you will need to seal it, the second is that the grain needs to be filled before you start spraying. Both of these can be done in one go by using Halford's filler primer, it expands slightly and fills the grain. Just sand with 120 grit and then apply your base coat. JLee: I happen to think that using sanding sealer is by far the best way to guarantee that you will get a total flat "wet" look to the finish. Otherwise, you find yourself adding layer after layer of poly (or whatever else) in search of that effect. As far as (bearing) edges, I'm not aware of sanding sealer being used on them, but to each his own. I tend to use tung oil, or sometimes wax. Jarick: Sanding sealer is used to seal wood and build up a clear layer upon which you apply your finish. While lacquer and urethane can do this, it will often take several more coats and a lot more drying time to do the same thing. Also, sanding sealer is easier to apply and sand. If you're looking to do a high gloss finish, satin (smooth) finish, or paint, it's almost a must. You apply a few coats of sanding sealer, sand it smooth, then a few coats of your topcoat (and wet-sanding and polishing). And on (bearing) edges, some people leave them unfinished, some people will use an oil (like tung), and I suppose some people could finish them in a topcoat like lacquer or urethane. I'd just do a coat of tung oil on the inside and edges of the drum for some basic protection of the wood while still exposing the wood pores. altereddesigns: If you are going for a full colour kit (not a stain etc) you can also use grain filler, made by Rustins. It's a paste that you mix with white spirit and then rub across the grain to fill the pores. Works very well. Also if a full colour paint job is needed and money is tight you can use the new kind of powdery wood filler around, it's very flexible and you add a small bit of water to make it easier to spread. Once dry, sand down and the grain is filled. Prime over the top of that and add top colour and lacquer. Endless Green sealer/grain filler This is a brand of sealer from Great Britain that has been recommended by BriT1969 at DrumTown.info. Basically, you mix it with some earth pigment (to match the color of the wood), add a little methylated spirit, and rub it into the shell with a spirit damped cloth. The shell then looks like you coated it with mud! Wait a few hours then lightly sand it off and all the grain is filled with the filler. Endless Green's website: http://www.endlessgreen.co.uk/product.php/sn/RUSGFN230G Their ebay page: http://www.ebay.co.uk/itm/Primary-wo...#ht_5424wt_905 In case their ebay page disappears (that sort of thing happens all the time) here's the description on it: Primary Wood filler (very fine powder) Used to make grain filler to fill wood grain and pores prior to french polishing, oiling or waxing. Mix with Earth pigments to get an exact colour match As supplied to Antique restorers for furniture restoration and repair work Mix the Primary wood filler powder with natural Earth Pigments and Meths (or varnish) mix into a paste a little thicker than toothpaste, adding more earth pigments until the right colour is achieved. Mix the colour to a darker shade than required, because it will dry to a lighter shade. To apply grain filler, use a folded slightly damp, lint free cotton rag, and dip this into the mixture, apply firstly in the direction of the grain and then in a circular movement going across the grain, this will fill the pores, then wipe away any excess with a clean damp rag before it dries. The filler normally dries quite quickly, but ideally leave it for 48 hours to dry. I would recommend to only mix up a very small quantity at one time as required. The powder, if kept dry and in a sealed bag has a shelf life of about 2 years. We sell a wide range of natural Earth Pigments in our Ebay Shop. Colour matching: Brown Umber, Burnt Umber, Yellow & Red Ochres, Raw and Burnt Sienna and Mineral Black are the basic pigments most commonly pigments used by the trade, these pigments are stable and inter-mixable and can be used to make many colours. For example: Raw Sienna = Light Oak / Antique Pine Raw Sienna with some Mineral Black = Medium Oak Raw Sienna 4 parts with 2 parts Mineral Black = Dark Oak Yellow Ochres with Brown Umber = Brown Oak Red Ochre with Brown Umber = Georgian Mahogany (Brown Mahogany) Red Ochre with Burnt Sienna = Victorian Mahogany ( Red Mahogany, Rosewood, Cherry) Burnt Umber = Walnut When Do You Apply Sanding Sealer? Q: Anyone know if you put the sanding sealer on BEFORE you dye the shell or AFTER you dye the shell right before you start your first coat of polyurethane? I was told by someone that you put it on before you apply the dye, but this doesn't sound right to me. Also, is a sanding sealer necessary if you dye a shell? Or will the dye fill in the holes? rhjanes: Apply any dye first. Sand smooth, then dye, then sealer. Dye doesn't fill anything, just colors. Sealer will help you get gloss and smooth faster, if that is the finish you are after. Topcoat and paints are just that - not a filler. Hence, they make grain sealer, primer/surfacers etc. tbone: I spray sealer first, before stain and/or urethane lacquer. SeanSMD: I usually use pore filler and squeegee first (before topcoat). It's a lot cheaper and less time consuming than using $80 a quart top coat to do it with. How Does Sanding Sealer Work? PDGood: Q: I have read that sealer is essentially polyurethane with thinner. If that is true (and I don't know if it is) how can it help build up quicker than just poly by itself? skaman: A: Sealer has a higher solids content than the topcoat. rhjanes: A: The sealer is high-solids and is made to quickly level the wood. Filling in the pores and grain. You will also wind up sanding OFF most of it. It is like a primer-surfacer, except for wood and is clear. Figure out the "look" and the topcoat, then look at the sealer for that finish. Universal Sealer Between Oil and Water Based Materials mckenziedrums: My "go to" finish these days is a waterbased product by Target Coatings called Emtech 9300... (Though I am trying out the Crystalac Super Premium on this Mahogany kit I'm building.) As someone that sprays my finishes I love using a waterbased finish since it's easy to clean up, is extremely UV stable, and has less of a chance of landing me in the ICU later on in life. That being said, traditional (oil based) products tend to bring out more figuring and life in the wood. To get around that issue here is the finishing schedule I typically use: 1-2 light coats of Waterlox Tung Oil (It's a modified tung that dries in 24 hrs) 1-2 coats of Zinnser SealCoat (Dewaxed shellac sealer/barrier coat) Topcoat with your choice of topcoat.... That's it... You get the beauty of an oil finish with the durability of a polyurethane, etc. I highly recommend the Emtech products from Target and they can be sprayed or brushed on. Typically I'd use Emtech 8800 for a couple coats then build up the 9300 top coat from there. If you use Crystalac it is self sealing so there is no other sealing product to use. Oh I will add... don't skip the Sealcoat... it's this barrier that lets you use a water based finish over the oil. sadolcourt: I've used that very formula, works great. I've no spray equipment, so I have to rely upon rattle cans. Zinsser doesn't seem to have a de-waxed shellac product in a disposable rattle can. Is Deft brand lacquer sanding sealer a suitable substitute? Or is it non-compatible with a water borne top coat? mckenziedrums: If it's a dewaxed shellac you're golden... I actually brush on the Sealcoat. Not worth the effort of cleaning my gun to spray it. PDGood: Maybe this is the answer to the "shellac is universal" comment someone posted without further explanation. Perhaps they were referring to your use of it as a barrier coat between oil and water. mckenziedrums: It's pretty darn universal... Can't think of a coating that won't stick to it honestly. Wet Sanding You can wet sand with oil or with water, but be aware that they are for two very different purposes. The purpose of sanding with oil is to fill the pores of the wood, so this has to be done on bare wood before any finish is applied. The purpose of sanding with water is to smooth a finish that has already been applied. Per rhjanes, what you are doing with this process is removing the high spots also called "the orange peel look". Wet Sanding With Oil This is done on bare wood before dying or anything else. It works like sanding sealer to fill the pores of the wood. rhjanes: You don't sand between coats of oil, you actually sand the oil (on) wet (sandpaper). This causes it to pick up some wood, which then gets forced into all the pores. Slow and labor intensive. Apply oil, dribble some on the sand paper, sand wet oil for about 20 to 30 minutes, dribbling on some drops as needed. After about 30 minutes, let it sit for just a few minutes, then, old-t-shirt or cheese cloth off the damp oil. Wait 24 hours and do it again. Each time, going finer on the sand paper until you are sanding wet oil at about 1200 to 1500 grit. Mike: If you plan on staining or dying your drum, DO NOT sand in the oil. Take my word on this. The "Sand-In" method usually takes about 6-8 coats. I don't generally sand the oil in for 30 minutes per coat either. Ray must have some super stamina. I go around the shell 2-3 times, let it sit for 10 minutes or so, then wipe the excess oil off the shell. You will notice that the oil will look a little dirty on the rag. Don't be alarmed - it's normal. This will give you the smoothest matte finish ever! sadolcourt: On raw wood, I only sand to 220, maybe 320. Using higher grits, so the theory says, and your burnishing the wood, preventing the stain or finish from penetrating more deeply into the wood. The premium abrasives, no surprise, leave a better finish at the same grit than cheaper brands. I use Norton 3X disks or paper (pretty decent stuff) for most of the sanding to 150, then finish with 220 or 320 Abranet. Like buttah. Wet Sanding With Water This is done when you are in the final stages of finishing. (Only wet sanding with oil is done in the prep stage.) There is detailed information on this under Finishing Types/Wet Sanding With Water. How To Create A Guide Coat Spray on the primer/surfacer. Let it dry. Lacquer, about 15 minutes is all it takes! Follow the instructions on the can. Then, dry sand at 280 or 320, maybe 400 if you have it fairly smooth. When it looks, under good lighting, that it is smooth, then take some Krylon or Duplicolor Black lacquer and just apply a quick dusting (guide coat) of paint. Let that dry. Then, when you sand, lightly, the High spots will vanish really quick (the black will almost wipe off). Lows and pits and pores, will still retain the black! This lets you "see" what is going on. The Basics PDGood: All wood on a drum should have some sort of protection and there are a number of products that can be used. Oils offer protection against moisture, but don't protect the wood from scuffs and scratches. Harder finishes such as polyurethanes and lacquers will protect the wood against both moisture and scratches. The most popular finishes currently are not the same ones that were popular a few years back - new products have emerged and improvements have been made, especially in regards to being eco friendly to the user. Still, some continue to use old methods because they either prefer the result. Here are some of the main choices from past to present: Oils From Wikipedia: When applied, it (Tung oil) provides a tough, highly water-resistant finish which does not darken noticeably with age as does linseed oil. This is not to say that it is a colorless finish; it still has a slight golden tint. Pure Tung oil has gained popularity in recent years among environmentally conscious and green consumers. Some regard it to be superior to linseed oil, which is susceptible to mold. PDGood: Just to clarify, Tung oil is not what most would call "tough" as described above. It doesn't offer resistance to a blow of any sort. It does, however, provide important moisture resistance. Expect an amber color when applying either Tung or Linseed oil (or most other finishes, for that matter). DISCUSSIONS FROM THE DRUMSHED FORUM 100% pure tung never really dries and if it does its soft and wrinkled and takes months for it to do that. It will clearly state if its pure. (Note: Driers can be added to Tung for this purpose and the Tung at Home Depot has driers in it.) mfp1016: A (Tung) oil finish of only 2 coats, despite wet sanding, will essentially do nothing except temporarily color the wood. It's about as good as natural wood. Tung oil needs at least 8 to 10 coats before it has any sort of protective properties. Also, make sure you're using 100% tung oil, not a tung oil finish (ie Formby's). FullCollapse: I pick mine up right from Home Depot. SeanSMD: Home Depot Tung is poop. More linseed and poly than tung. Pure tung oil comes from the leaves of the tung tree and and is a very high quality finish and expensive. ($20-$30 a quart where the Home Depot variety will be $5-$9) moosryan: That having been said, most of us here just use Formby's, which isn't pure tung. I use it, seems to work alright. The Arm-R-Seal is a much more durable and a protective finish than Watco Danish oil. Both great finishing products, the Watco is real thin and oily going on, but gives a nice hand rubbed luster look. The Arm-R-Seal, an oil varnish mix, still oil, but more resins and a bit thicker than the Watco - more protection, and a bit more of a gloss to it when finished. I believe the two products are both oil based (Watco danish oil and the Arm-R-Seal). Here's what I would do, create a test piece the same way your drum is, including the buffing with 0000 steel wool, Then go ahead and give your Arm-R-Seal an application or 2. See what you come up with. The other thing to try would be to give 1-2 thin wipe on coats of Zinzeer "Seal Coat" then move onto your Arm-R-Seal. The "Seal Coat" is a dewaxed shellac and is designed to be applied over or under almost anything, oil or water based. It's used for many reasons. It could be used as a sealer, bond coat, finish coat (although not the most durable). All of the products mentioned (Watco danish oil, Arm-R-Seal, and the Zinzeer "Seal Coat") are great products. Easy to apply and give great results. I use the Watco Danish oil and Waterlox (straight out of the can - beautiful) and love them both. Waterlox is very similar to the Arm-R-Seal, they are both an oil/varnish mix. Many people recommend (Sam) Maloof's oil. (There are) many complaints about Formby's products being too runny. A guy at a woodworking shop tells me that Danish oil is just a different combination of oils (including tung oil) varnish etc. to kind of speed up the process, that the term "danish" is really purely a marketing name. Secondly, he says that the Formby & Minwax are also a tung oil with different types of additives, etc. The consensus on this site seems to be in favor of the Minwax tung oil. I am leaning towards the Minwax tung (the stuff at Home Depot just says tung not satin or high gloss). If you want a shiny and completely flat finish (very hard and time consuming!) use sanding sealer then the tung and wet sand, polish, wax. If you want low lustre with pores showing, go straight tung and some OOOO steel wool. For a low lustre perfectly flat: sanding sealer, tung, wet sand, steel wool. You don't wet sand tung between coats. Keep applying coats of tung, just dip a cloth in it and rub it into the shell. I normally put on about 10 + applications - not quite coats because it doesn't build, the wood just soaks it up. Once you've got that, then hit it with some 0000 steel wool and buff it up nice. you can wax it after that if you want more gloss. Yet another tung method: 0000 steel wool the drum. Apply first "coat" of tung. Wait one day. Apply second "coat". Wait a day. Etc. After the 5th application 0000 steel wool the drum. I do about 5 more applications of the tung. At this point i will 0000 steel wool the drum. Wait about a week. Steel wool again (just to get out any dust etc.) Then buff it up with the electric buffer using paste wax. And another tung method: I barely sand tung. I get the shell prepped extremely smooth then apply very light coats, many many many (like 25) of them until there's a bit of a buildup. Here's an example. I also oil up the edges and inside but not the same as the outside of the shell. This is a jtpco cherry, repete owns it and plays it a lot I hear tell. Btw, there's no wax or polishing going on with this shell. It's all meticulously oiled to be extremely smooth. I seriously only sanded this maybe every 10th coat and that was just with 2000 grit very lightly and dry to knock off some of the very small bumps. At the very end I sanded again, then applied one very last coat rather than polishing it up. I can't stress this enough Don't use sealer on an oil finish. The oil can't get through the sealer. Sealer is basically lacquer. You use sealer before lacquer in order to minimize the number of coats of clear it takes to get enough on there. Oil works by soaking into the wood. If you put lacquer onto your drum the oil cannot soak in! Gloss tung is a hard finish to get nice. Wet Oil I would think if you are using Danish Oil (or any type of oil for that matter) that you should NOT use sanding sealer as you want the oil to absorb into the wood somewhat to seal it. Danish Oil, Maloof, slow drying stuff, is the "sand into the wood while wet" stuff. NOT TUNG!! To apply oil while wet: coat the shell, then dribble some on the paper. I wouldn't recommend this on a shell that has been dyed. if its dyed...... 1. Apply oil to shell, let it sit 5 minutes or so, wipe off. Let dry for 24 hrs. Do this 4 times, then on the 5th coat use 600 grit paper to sand. You are only trying to sand into the dried oil, not the dyed shell. Be careful not to cut into the dye. I did this once and only once. That shell was then turned into ashes This is typically what method most people use with Maloof oil. For regular tung oil, I'd just do a bunch of thin even coats. (a bunch meaning 20 or so) give it a little sand after about 6-7 coats just to make sure its level. Vaughn did a shell like with tung that looked glassier than lacquer or urethane. Wet oil - another opinion: Apply the oil to the wood, work it in for a minute. Put a few drops on the sand paper, sand the oil mixture into the wood. Let it sit a few minutes. Wipe dry. Doesn't take too long. Just keep the oil moist (not running off). On the inside, I usually sand it like this at 280 one time. The next night, do it again with 320. DONE! Wet oil - and another opinion: If it is a wood oil, you apply it, and while wet, sand that into the wood. Apply drops of oil to work it into a slurry. Let it sit about 5 minutes after you finish sanding. Then, whip it dry and let it dry 24 hours. Keep doing that. The sand paper should be 600 the first time, then 800 the next time, 1000, 1200 and finally 1500 The gunsmith suggested the danish oil-varathane mix and that is working well. Easy as hell to work with! The mix is not exactly 50-50, I would say 45 oil, 55 Varathane with a few drops of Japan drier. This (picture) is only sanded in to 1000, that's it, no wax... I was going to leave it, but I would like to see the results to 2000 grit. Topcoating Oil Oil is very similar to lacquer in that you really need to let it cure before you get to shinnin' it. Whenever I use oil I apply the first coats over top before the previous one is 100% dry, then I let it cure - 24 weeks. Then I go over it with steel wool dipped in oil so it acts as a lubricant. You never get a high gloss lacquer shine, but you will get a nice sheen - and it's usually commensurate with your level of patience! The last step should be to use a quality furniture paste wax and buff to a nice satin sheen with a soft cloth. I take some 0000 steel wool and lemon oil on my oil finishes. That adds to the sheen. But you need the oil to dry first....I think I waited about a month on the Maloof oil! Smooth Matte Finish With Oil You don't sand between coats of oil. You actually sand the oil wet (600 grit). This causes it to pick up some wood, which then gets forced into all the pores. Slow and labor intensive. Apply oil, dribble some on the sand paper, sand wet oil for about 20 to 30 minutes, dribbling on some drops as needed. After about 30 minutes, let it sit for just a few minutes, then, old-t-shirt or cheese cloth off the damp oil. Wait 24 hours and do it again. Each time, going finer on the sand paper until you are sanding wet oil at about 1200 to 1500 grit. Then, matte wax. Another method: If you plan on staining or dying your drum, DO NOT sand in the oil. Take my word on this. The "Sand-In" method usually takes about 6-8 coats. I don't generally sand the oil in for 30 minutes per coat either. Ray must have some super stamina. I go around the shell 2-3 times, let it sit for 10 minutes or so, then wipe the excess oil off the shell. You will notice that the oil will look a little dirty on the rag. Don't be alarmed, it's normal. This will give you the smoothest matte finish. Maloof Oil Finish rhjanes: Sand at 320 and 400. Tack off. Tack off. Apply oil/poly mix. Sand oil in at 400, use cheese cloth to wipe off the excess. Tack off. Apply oil/poly mix. Sand oil in at 600, use cheese cloth to wipe off the excess. Tack off. Apply oil/poly mix. Sand oil in at 800, use cheese cloth to wipe off the excess. Tack off. Apply oil/poly mix. Sand oil in at 1000, use cheese cloth to wipe off the excess. Tack off. Apply oil/wax mix. Sand in at 1200, use cheese cloth to wipe off the excess. Tack off. Apply oil/wax mix. Sand in at 1500, use cheese cloth to wipe off the excess. The trick is with Maloof, keep it wet with oil as you sand the drum! Messy, sort of fun! You are sanding in the oil and wood together. Wait 24 hours between each sanding step! Yes, it takes time. Tung Oil Finish The standard application for tung oil is just as deuce13coop describes below: "once a day for a week, once a week for a month, once a month for a year and once a year...forever". deuce13coop: Although the majority of the products labled as Tung oil are a combination of oils (generally Tung and Boiled Linseed oil) and dryers like Japan dryer, the only true Tung will be labled 100% Tung oil and it's price will reflect that difference. Nothing wrong with Tung oil mixtures though. There's a reason they add those things. I like Behr Tung oil(mixture). I have a workbench I used it on with which I followed the "once a day for a week, once a week for a month, once a month for a year and once a year...forever". That thing is friggin tough now! rhjanes: Tung Oil Finish Apply the oil/poly, wet sand the oil in at 400. Wipe off the excess with cheese cloth. Apply the oil/poly, wet sand the oil in at 600. Wipe off the excess with cheese cloth. Apply the oil/poly, wet sand the oil in at 800. Wipe off the excess with cheese cloth. Apply the oil/poly, wet sand the oil in at 1000. Wipe off the excess with cheese cloth. Apply the oil/wax, wet sand the oil in at 1200. Wipe off the excess with cheese cloth. Apply the oil/wax, wet sand the oil in at 1500. Wipe off the excess with cheese cloth. Wait at least one week and then 0000 and lemon oil or wax it. This is a great satin finish. Hard and durable. Easy to repair. Scuff sand, apply oil, sand in at 1000 or 1200. Wait (can be using) one week. Lemon oil or wax the area. BreakerBoyDrums: So I am applying a tung oil to my mahognay shells and it is taking forever to get a nice finish out of it. It seems to dry in spots and stay tacky in other spots, even after I let it sit for a day or two...Basically it's not even and I have done all I can to make it smooth and even throughout. Will it eventually even out the more I apply coats of tung? Any suggestions how to fix this? Shiloh: Hi, what oil are you using - is it straight up, linseed blend, or something like minwax? I`ve found that straight tung or that mixed with linseed will tend to stay tacky for quite a while, also where the wood absorbs a lot, it will take more time to cure. Be patient, keep applying untill it evens out, rub out well between coats, it's not a quick finish, for that god gave us laquers and polys. 8yrsexp: If you're using pure tung oil it never truly dries, though after a while it feel dry. Also when applying tung oil, you (get) a lot of bleed back which is where the wood squeezes out some (of) the oil it has absorbed. Be sure to wipe off excess oil at regular intervals after applying. deuce13coop: Are you putting it on then wiping off the excess? Even though it takes a while, multiple thin even coats are better than slopping on a few thick coats. rhjanes: I don't have a can infront of me, but last tung finish I did, I had to wait a week between each coat. Then, dry sand it or 0000 steel wool it (sandpaper seemed to do better), to level it. Apply another coat, wait a week. Once done, last coat just goes on and drys, nothing else. BreakerBoyDrums: thanks all!!! I am using Formby's Tung Oil Finish and i do wipe off the excess. Does anyone recommend sanding it down and applying a poly or lacquer over it? PDGood: I used Minwax's tung oil and you can apply poly over it. I called their support dept. and they recommend 2-3 weeks dry time first. skaman: You can think about sanding in the oil with sandpaper starting around 600 and working up. It can help make the surfece appear more uniform. I've had great results with this method. Secret Oil Finish rhjanes: You mix 3 parts boiled linseed oil, to one part turpentine (or high quality mineral spirits) and add a few drops of japan dryer (you can get that at a paint store). That is your oil mix. Here's the trick. You warm up this mixture in a glue pot, then apply it with a brush, use a lot of it, really get that shell oiled up, then let it sit on the shell for 30 minutes, then wipe off the excess. Then you sprinkle rottenstone onto the shell, apply more oil (less this time) and make a paste out of the rottenstone and oil. This you rub into the shell using a burlap sack. (I'll use cheese cloth). Then you wipe off the excess (paste and oil). Wait one week, then repeat this process for about 5 coats. Each coat let dry for a week they say. !" I suspect, because Linseed oil takes a long time to dry out (if it ever does). Then, it will also be thinned! So I guess the big secret is: A: The oil mixture. B: Letting the first coat sit on there for 30 minutes before wiping off the excess. C: rottenstone and oil paste mixture, applied via burlap sack. I had to Wikipedia the rottenstone. It's an aged limestone. Like a very fine pumic, even finer than that. Stuff's almost black. It was hard to find. I got it at a very extensive, mom-and-pop hardware store that has been around for decades. For prep, I sanded the bare shell with a pad with 320, then 400 and finally, 600 grit sand paper (dry sanding). I then Tack-ragged off the dust. I made the mixture and then applied it. Probably wasn't hot enough. I kept it wet for about 15 minutes, then hung it up to set for 30 more minutes. Then, I used cheese-cloth to wipe it dry. I then applied more oil and the rotten stone. I rubbed that mixture for 30 minutes! It got sticky as it worked into the wood. I then used some more dry cheese-cloth to dry it and hung it up. I'm thinking on the next application, to put some rottenstone in a small poached egg cup I have, add the oil, mix. I can dab the cheese-cloth in that and mess with it. I think I'm done with the oil. About 6 applications over 6 weeks time! I posted photos to mydrumpix. Photos include the oil being heated, the dry sheen, the wet sheen, the rottenstone in an egg poucher I dip the oil wet rag into, the wet oil and rottenstone on the drum. I'll let it sit a week now and then mark it to drill. I say I'm done. I was down to only about a tablespoon of oil left now. I added some mineral spirits in case I need more. Photos here. http://www.mydrumpix.com/showgallery.php?cat=650 sadolcort: For rottenstone supply, Woodcraft normally has it. www.woodcraft.com My favorite brand of linseed oil is Tried and True. Also available from Woodcraft. This oil has no dryers in it, it does take a long time to cure naturally. Applied in very thin coats with T-shirt cotton, it likes 24 hours to sit, then a quick buffing with T-shirt cotton before the next coat. In warmer daytime temps, it needs about a week before most of the oil scent disappears; in colder daytime temps, it takes longer. I've just worked around its native properties. I've not had T&T ever go sticky on me, but there is a small amount of grab once you get to buffing. If the buffing rag gets too oily,then too much was applied initially. I'm sure with some experimentation, you can either add the rottenstone to the next coat of oil, ore use some very fine sandpaper (600 grit or better) as the oil applicator. Birchwood Casey Tru-Oil trickg: Just curious, but has anyone tried Birchwood Casey Tru-Oil as a finish on a drum? This is basically an oil-based finish designed for gun stocks, and from my perspective, it looks really nice. sadolcourt: Their web site shows it's linseed and other oils. I found a random link on Google indicating Tru Oil should be thought of as a varnish. I've never used Tru Oil. My fave finish for furniture is Tried and True brand. No petroleum, no driers, no nuttin', just linseed oil. It's a tad thick, needs a bit of elbow grease to rub it into the wood. Comes in 3 variants, linseed oil, linseed/wax and a varnish oil. It is golden in color, making cherry sing and walnut pop. It takes a few good days to cure, as there are no driers in it, so I'm inclined to oil a project when it's above 70 degrees consistently. It gives off a raw oil smell for a bit of time. 3-4 very thin coats makes the world go 'round. Shellac From Wikipedia: Shellac functions as a tough all-natural primer, sanding sealant, tannin-blocker, odor-blocker, stain, and high-gloss varnish. Shellac was once used in electrical applications as it possesses good insulation qualities and it seals out moisture. Shellac is often the only historically-appropriate finish for early 20th-century hardwood floors, and wooden wall and ceiling paneling. From the time it replaced oil and wax finishes in the 1800s, shellac was the dominant wood finish in the western world until it was replaced by nitrocellulose lacquer in the 1920s and 1930s. It remained popular in the Southern United States through the 1950s and 1960s.. PDGood: These days de-waxed shellac is used on drums as a grain filler or as an in-between layer to separate layers of oil based and water based products. Very few people use it as a final finish for reasons listed below. Nitro-Cellulose Lacquer From Wikipedia: These lacquers were a huge improvement over earlier automobile and furniture finishes (such as shellac), both in ease of application, and in colour retention. The preferred method of applying quick-drying lacquers is by spraying, and the development of nitrocellulose lacquers led to the first extensive use of spray guns. The nitrocellulose and other resins and plasticizers are dissolved in the solvent, and each coat of lacquer dissolves some of the previous coat. Nitrocellulose lacquers produce a very hard yet flexible, durable finish that can be polished to a high sheen. Drawbacks of these lacquers include the hazardous nature of the solvent, which is flammable, volatile and toxic; and the handling hazards of nitrocellulose in the lacquer manufacturing process. Lacquer grade of soluble nitrocellulose is closely related to the more highly nitrated form which is used to make explosives. PDGood: Fast drying. It makes a quality, hard finish, but is highly toxic. Requires respirator and a ventilated environment to use safely. Acrylic Lacquer From Wikipedia: The advantage of acrylic lacquers... is an exceptionally fast drying time. The use of lacquers in automobile finishes was discontinued when tougher, more durable, weather- and chemical-resistant two-component polyurethane coatings were developed. The system usually consists of a primer, colour coat and clear topcoat, commonly known as clear coat finishes. It is extensively used for wooden finishing. Acrylic is also used in enamels, which have the advantage of not needing to be buffed to obtain a shine. Enamels, however, are slow drying. Water based lacquers From Wikipedia: Due to health risks and environmental considerations involved in the use of solvent-based lacquers, much work has gone in to the development of water-based lacquers. Such lacquers are considerably less toxic and more environmentally friendly, and in many cases, produce acceptable results. More and more water-based colored lacquers are replacing solvent-based clear and colored lacquers in underhood and interior applications in the automobile and other similar industrial applications. Water based lacquers are used extensively in wood furniture finishing as well. Polyurethane From Wikipedia: Polyurethane formulations cover an extremely wide range of stiffness, hardness, and densities. Polyurethanes are often called "urethanes". They should not be confused with the specific substance urethane, also known as ethyl carbamate. Polyurethanes are neither produced from ethyl carbamate, nor do they contain it. The Minwax polyurethane is available in water based and two oil based versions - the standard fast drying version and a high-build version that only requires two coats. Minwax Polycrylic® From the Minwax website: http://www.minwax.com/products/water_based_clear_protective_finishes/ A clear finish topcoat in a water-based formula that offers protection along with fast-drying times. Can be used over bare wood, oil- and water-based stains, paint and wallpaper. Minwax Wipe-On Poly® From the Minwax website: http://www.minwax.com/products/water_based_clear_protective_finishes/ Water based version - A clear finish topcoat that provides durability with a classic hand-rubbed look along with the convenience of a water-based finish. Oil based version - A clear finish topcoat that provides protection with a classic hand-rubbed look. Minwax Helmsman Spar Urethane From the Minwax website: http://www.minwax.com/products/water_based_clear_protective_finishes/ Water based version - A crystal-clear, non-ambering finish specially formulated to provide long-lasting beauty and tough protection for your wood, indoors and out. It says "Water Based" right under the Minwax name. Oil based version - A protective clear finish topcoat that offers long-lasting protection for interior or exterior wood that is exposed to sunlight, water and temperature changes. What is a Varnish? From Sawmill Creek (http://www.sawmillcreek.org/showthread.php?t=26295) John Hemenway: "Varnish refers to finishes made from hard, durable synthetic resins that are modified with a drying oil. The resins have names like alkyd, phenolic and urethane, and the oils are tung and linseed. ... Urethane varnishes are generically referred to a polyurethane and have the best resistance to heat, solvents and scratches." Howard Acheson: As has been said, oil based varnish is a resin and an oil mixed together and heated. At a certain temperature the mixture combines into a new compound called varnish. All current varnish resins are plastics of some type. Phenolic, alkyd and urethane (polyurethane) are the plastic resins used. The oils are linseed oil, tung oil and/or one of a couple of semi-drying oils. So as far as the basic product, all varnishes are pretty similar. What makes for some slight differences is the type of resin and oil and the proportion of oil to resin. Phenolic resin and tung oil makes for a slightly more water resistant finish and these varnishes are the true marine products. Add more oil and the finish becomes more flexible and soft so that it can be used on softer wood or where the finish must be able to flex. Softer finishes are naturally more scratch resistance and almost all polyurethane varnishes are relatively soft. Urethane resin is less expensive than the others and, combined with its somewhat greater scratch resistance and heat resistance, it has taken over the varnish market. There are no hard and fast rules with finishes but, to a great extent, the thicker you build the finish, the "plasticy" it will look. It makes little difference whether you use a urethane resin product or one of the others, they all make the wood look like it were encapsulated in plastic. But, urethane gets a cloudy appearence when it gets thick and many folks refer to this as the "plasticy" look. Phenolic and alkyd resins are clearer. I prefer non-urethane finishes in general. But, there are certain applications where the additional toughness of urethane is a benefit. For kitchen tables that get hard use, hall tables that get the car keys thrown are where a urethane finish might be the one to use. (Note from PDGood - drums would definitely fall into this category.) Finally, 2-3 coats of full strength finish is just as durable as more coats. Scratches occur in the first couple of millemeters of the finish whether it is one coat thick or six coats thick. 2-3 coats get you to the thickness where water and watervapor protection is maximized so there is little benefit to applying more coats. Remember, the more coats, the more likely any finish will look "plasticy". I learned a good portion of my finishing in the marine environment. The primary reason for 5-6 coats is for UV protection. It takes a certain film thickness to provide the UV protection and to allow the sandoff of some of the finish when refinishing. Steve Schoene: ... while I would tend to use 4 or 5 coats of varnish on a kitchen table top, by the time the first several of those have been used to complete any grain filling, and elimination of the artifacts associated with not having a "clean room" I doubt I end up with the equivalent of more than 2 or 3 full, unsanded coats. In most cases, you are correct that that is fully sufficient. Such a finish will still significantly reduce the impact of seasonal moisture swings. But it is still important in choosing a finish to weigh the fact that more film thickness really does imply more protection, and that a very thin film--three coats of a thinned wiping varnish, for example--doesn't convey the protection that one might think is automatic with "varnish". This has to be balanced with appearance. (Note from PDGood: In drum making, it's not unusual to have to use many more coats to fill the grain of some woods if you're going for a high gloss finish. Mahogany in particular is challenging. As mentioned, it may not add to the protection, but it will add to the smoothness of the appearance.) Stu Ablett in Tokyo Japan: Basically there are two kinds of finishes; Penetrating - this type is a straight oil and cures soft, so it should not be "built up" on surface of the wood. Film - finishes cure hard, so they can be built up to whatever thickness you want (within reason). There are five kinds of "Film" finishes. Shellac Lacquer Varnish (polyurethane is a type of Varnish) Water Base Conversion (conversion varnish and catalyzed lacquer) The most important difference that I have learned about these film finishes are how they cure, there are three methods; Evaporative (Solvents are alcohol, acetone, and lacquer thinner) Shellac Lacquer Pigment stains with Lacquer binder Wood Putty with Lacquer binder Wax (Solvent is mineral spirits or turpentine) Reactive (Thinners are mineral spirits and naphtha, often listed as "petroleum distillates") Linseed oil and Tung oil Oil/Varnish blend Wiping Varnish Varnish Polyurethane Pigment stains with oil or varnish binder all in one stain, seal, and finish suing an oil or varnish binder Paste wood filler with oil or varnish binder Glaze with an oil or varnish binder Coalescing (Solvent is glycol ether; thinner is water) Water based finish Pigment stains with water based binder All-in-one stain, seal, and finish using a water based binder paste wood filler with water based binder Glaze with water based binder Shellac and Lacquer are evaporative finishes that cure by the evaporation of the solvents in them. Varnish, curing oil and conversion finishes are reactive, they cure by a chemical reaction, taking place, after most of the thinner has evaporated. Conversion finish cures when a catalyst is added. Water based finish is a coalescing finish, it is made up of already cured chunks of finish that are suspended in water, it cures when the water evaporates, and the chunks then coalesce into the film. Ok more on each one. Evaporative finishes are made up of solids that are dissolved in a solvent. When the solvent evaporates, the solids are left, and they form a film finish on the wood. The can be imagined as tiny long skinny strands of solids, when the film forms, the long strands intertwine to form a fairly hard surface, but the strands of solids, while interlocked do not bond to each other. This type of finish can be re-evaporated by introducing the solvent suspending the solids again. When you apply a second coat of the evaporative finish, the solvent in the new coat will partially re-dissolve the first coat. Evaporative finishes cure from the bottom up. Reactive finishes change chemically when they cure. As the thinner evaporates the resin chunks come closer together, then the chemical reaction happens and they link on a molecular level in a network like those tinker toys we played with as kids. This is often called "Cross-linking or Polymerization". When you apply a second coat of this kind of finish, the first coat is not affected; it does not soften at all. Oxygen is the catalyst in most. The pros use conversion finishes which have catalyst added to them like 5-minute epoxy, but they are used only by the pros. When you want to apply a second coat of reactive finish, you have to scuff the finish to create a mechanical bond between coats. As reactive finishes cure from the top down, and uses oxygen to do so, thin coats are a must. Applying a fresh coat of reactive finish over a coat that is not totally cured with often result in a nice wrinkle overnight, as the underlying coat had not finished releasing its Oxygen. Coalescing finishes are usually water based, and have a bit more going on that either reactive or evaporative finishes, and are actually a combo of the two. This coalescing finish is made up of chunks of already cured, cross-linked finish suspended in the water. There is also a solvent, usually glycol ether, which evaporates slower than the water does. This solvent softens the chunks of already cross-linked finish, and as the water evaporates, the softened chunks come close together, and connect, or interlock with each other, but they do not cross-link with each other. This type of finish also cures from the bottom up. The main diff between the three types is how they cure, and how the molecules cross-link in the finish. The only finish that really cross-links is the reactive finish, it forms a very hard to break apart finish and is very tough. The evaporative finish does not cross-link at all, and can be re-disolved at any time by the use of it's solvent. The evaporative finish may not be as tough, but that has some advantages, it is the easiest finish to rub out to a nice sheen, to repair, and to strip, while the super tough reactive finish has it bad points too, it is hard to rub out, repair or strip. The coalescing finishes are in a middle ground between the two, they have cross-linked chunks that are the main part of the surface, but they can be softened by a thinner because the chunks are not cross linked to each other, but only interwoven. Poly vs Lacquer DISCUSSIONS FROM DRUMSHED: rhjanes: Lacquer is nasty stuff - easy to use, cheap, toxic, hard to dispose of etc. It also doesn't play well with hardly any other finishes. Lacquer is a brittle topcoat. It will chip. Poly is less chip prone. One of the beuaties of lacquer is that is dries quick and doesn't get as much trash in it. and when it does, wet sand and polish and the trash is gone. But the neatest thing about lacquer is that you can sand it a few hours after you spray! rishjo15: I don't use lacquers because of the high amount of toxins in some of them (I don't have a respirator). I use water base poly for glosses, although it has a lot of different properties than lacquer. sjcdrummaker: Polyurethane is a bit easier to work with... dries faster, quicker results. Lacquer is a more tedious process but it dries harder and clearer than poly. It also stinks more. Phat Tubz: Poly dries quickly and is more scratch resistant. I use a self-leveling Nitro Cellulose Lacquer. That way as it dries, the orange peel effect smoothes out. Lacquer has to sit for a very long time to cure though. Lacquer Types DISCUSSIONS FROM DRUMSHED: Our4_Gret: I was searching through the forums to check if anyone with more experience than myself has made a distinction between newer Acrylic Lacquer vs conventional nitrocellulose lacquer in their experience of finishing drum shells. I understand acrylic dries dead clear and can be a little more $$, but that's the limit of my knowledge. Anyone with more experience like to comment? sweetdrums: - Nitrocellulose: Relatively inexpensive, quick drying, and the cured resins provide a reasonably good protective layer. Not completely clear though, it will add a yellow tint. - Acrylic lacquer: Avoids the yellowing problems associated with nitrocellulose lacquer. It's mainly the clarity of the products that is different. You will need to determine what is best to match your shells. rhjanes: Acrylic is what you find on store shelves. Nitro is a bit hard to find. Developed a LONG time ago, very toxic, etc. Reranch.com (a guitar refiishing place) carries it. I've used it from them and also Deft from the local paint store (both in spray bombs). Both went on about the same, require wet sanding and buffing and Nitro IS a bit yellow-ish. Spraying Lacquer sumojoe14: I am making my first drum. It is 12" by 6". I have the stain done and have lacquer on. So far this is my process. -sand -stain -sealer (4 coats) -sand with 400 -lacquer (4 coats) -sand with 800 -lacquer (4 coats) -sand with 800 -lacquer (4 coats) Now here's my question. How long before I can sand with 1000, 1500, 2000? Should I let it cure for a week? The way I sprayed has been lay 4 coats within an hour letting it sit for 24 hours then do it again. I just dont want that crap stuff that sticks to the sanding paper to imbed in my finish. I think it is lacquer that builds up on the sand paper that is not completely dry. And also how long to cure before I buff it? rhjanes: You are on the correct path. Use water to wet sand. That stuff sticking, just happens. Change out the sand paper when it does. it. I sand with one grit, going around the shell. Then, flip the paper, and flip the shell, and do it again. Next grit, same process. sumojoe14: Thanks rhjanes, but my main question is how long should I wait to wetsand then buff? jarick: I wet sanded all of the grits at once. I went 600, 800, 1000, 1500, and 2000, then rubbing compound, then scratch remover, then polish - all sequentially in the same day. That snare I did in my signature went from raw shell to completed snare in under a week. The big thing is building up coats, and with lacquer, they burn into each other. I sprayed several thin coats every hour or two, then let it harden for a couple days. After wet sanding through scratch remover, let it sit for at least a couple weeks to "cure" (it never fully cures). Then you can wax or polish it. rhjanes: Oh... With lacquer I'd wait 24 hours to wet sand. You can buff immediately after you wet sand. If you need to cut time, spray on the lacquer. Wait about 4 to 6 hours and wetsand, then, polish. Trick is with lacquer, do NOT wax it until about 30 days!!!! So, rush case. Spray, wait 6 hours. wet sand, buff, assemble and play. 30 days later, take apart and wax and put back together. Unknown author: To spray lacquer, use a filter with the compressor, so you don't get moisture in the compressed air. Water and Lacquer don't mix! Trick is about sanding lacquer, you wind up removing half of it to get the orange peel out of it! You should, when you are ready to final sand it, wet sand. Then, polish. It should be high gloss then. rhjanes: Dry sand shell to 320, using a backing pad on your paper. You can raise the grain, by wiping the shell with some water first. Then, sand to 320. Let it dry very well. Tack off the shell. If you are doing a dye, apply that, you probably need at least two coats to get it even. If going for a gloss finish or a finish were you do not want much if any of the pits or the pores showing, then apply sanding sealer. I use about 5 coats, sanding in between. Then, about 10 coats of nitro lacquer, wet sanded and polished. The neat thing about lacquer is you can always sand it down and re-shoot some more on to fix runs, drips, errors, dust etc. Lacquer Repairs and Application beef: I am fixing up some old Pearl Master extra (black stain then clear lacquer) and they have some scratches and marks in the finish that I want to get rid of. Any ideas about surface treatment before polish/wax? latindrum: If the scratches aren't too deep, I would wet sand them with some 1000 grit and buff them out with a high speed buffer. If the scratches go down to the color, you might have to take down the clear coat, fix the stain, and re-clear them. phan250: I have a client who needs a quick patch done to his bass drum. He has some serious/deep scratches in the lacquer and he wants me to fill them while I am re-finishing his toms. Can I just fill the holes with any lacquer and sand/polish or do I have to worry about sanding the whole drum and matching the lacquer on the whole shell? On his others, I am sanding the whole shell, but I'm re-dying them different colors, so the brand of lacquer I use is not an issue. Any thoughts? ctdrum1: I've had reasonable luck fixing scratches in the topcoat of clear lacquer. I've just feathered the scratch out with fine sandpaper. Masked around the feathered area and slowly built up the new lacquer. When it's cured I wet sand a little larger area, then polish out the whole thing. It's not perfect, but it's better than redoing the whole drum. I've yet to do this and have to match up the base color though. It might be worth trying on the bottom of the bass drum hoop where it won't be noticed. jrfrond: Assuming the lacquer is synthetic (nitro can be invisibly repaired), there is nothing you can do that will not show "witness lines" where the drop-fill was done, even after sanding and polishing out, because synthetics do not dissolve into themselves. Polys are the worst offenders because they are catalyzed finishes, which harden by chemical reaction, not solvent evaporation. Clear CA glue works well as a drop-fill for clear lacquer. I usually blend the medium and thin grades to give it some "body", but still maintain the flowout quality. Once cured, it buffs just like lacquer. drumwerx: I have done it where you just drop lacquer on the scratch and then sand it and drop again. It will look like misquito bumps or hills on a long scratch. Then sand 400 on the area only, 800, 1200 and buff and polish and it comes out great. max: I've been trying to find a lacquer based primer as I have a kit I want to re-finish in a gloss white. The finish now is semi-gloss Deft lacquer. I have called around and searched the web for a lacquer based white primer (in an aerosol) to no avail. I'm in California and the paint and car guys are telling me that TRUE lacquer is being phased out - everything is moving towards urethane. It's sorta mind boggling as it seems people use the term 'lacquer' for any type of glossy finish when in fact it might actually be acrylic, polyurethane, urethane, enamel etc. Also tough to get a straight answer as the salesman usually will bend the answers to sell what they have in stock. Anyway, can a non-lacquer primer be sprayed over the top of lacquer? What about kilz? I don't want any grain showing. thanks... rhjanes: What they are saying about lacquer is true. Lacquer is nasty stuff! Easy to use, cheap, toxic, hard to dispose of etc. It also doesn't play well with hardly any other finishes. You have some choices I know of. 1) www.reranch.com. Probably has lacquer primer in rattle cans (I know they do). Sort of expensive. 2) Sand them all down. Spray with a "Primer/Sealer". Top coat with another product. Another thing, when you mention "no grain" do you mean the pores and pits? You want to shoot the primer/sealer. Let that dry. Then, don't sand, shoot on Primer/Surfacer (also called High Solids). About 3 coats. Lightly sand that. Check for the pits and pores. Sand more, spray more etc.... until you cover all the pits and pores. Then, topcoat. Q: Can you lacquer wood that has been treated with Vaseline? A: I've shot lacquer, enamel, urethanes.......nothing sticks over Petroleum Jelly Q: I've gone through 2 cans of gloss lacquer on a 6x14 snare shell? Am I overdoing it? I consider 3 times around the drum with nice even spray as 1 coat. I say I get about 9 coats per can but I like to lay them on thick. So yeah 18 coats, it's thick as hell. A: Woody said he put 3 cans into the entire oJ kit. A: You didn't overdo it. Just don't need anymore. Let it sit...seriously...for a month before you start sanding. That much lacquer is going to need to cure for a while. Don't sweat it, I usually would shoot 2 cans on a snare shell and my finishes would look friggin spectacular if I must say so. To Define Figuring Oil will pop the grain and define the figuring. (Use) Danish or even boiled linseed oil. If you plan to do any type of fade with dye .... do it first, then oil. Another method to define figuring: Luthier refinishers recommend a dewaxed shellac coat {as a sealer and to bring out highlights of figured wood} and then doing lacquer. An option to oil: Target coatings are all water based and work quite well. From their site .... Quote: The Oxford® Ultima-WR Clear Base (WR400xx) can be used as a "Danish-Oil" type finish, bringing out the natural color tones of domestic and exotic woods without the introduction of dyes or pigments. Again, due to the emulsified linseed oil backbone, the Clear Base will cure and age to a soft amber tone, identical to linseed oil in turpentine but without the flammability or combustibility issues inherent in the older blends. I concur. One coat of the clear base stain followed by a couple coats of the blonde Oxford UltraSeal-WB Water-Based Shellac will pop the grain/figuring. If you go with the clear base stain .... be sure to wipe off access and let it cure for at least 24 hours (more if you can wait) before proceeding with the shellac. Target says you can topcoat after about 2 hours ..... I don't trust that. Not with the linseed oil backbone. I prefer to let it cure a good while. The shellac, on the other hand, cures quite fast. You can get a decent effect with just the shellac .... but I feel that the clear base stain really helps with the POP. I also find that their sanding sealer EM8800 and USL do better when reduced 10% with distilled water and applied in light coats. If you go pilling on the products per coat .... you run a very strong risk of blushing the finish (trapping solvents in the film structure). Ghelley's mahogany kit was sanded & rubbed with a finishing oil, about 10 coats in total, sanding with finer paper between each coat, last two coats used 0000 grade wire wool instead of sanding. Clear Finishes rhjanes: I don't know who we owe a thanks to, but here is a write up on finishes: The following is a little breakdown on the most commonly used clear coatings in the hobbyist level of wood finishing, and please keep in mind, that if you smack, rub, drag or grind anything sharper than your elbow across most common types clear coat finishes, you take a chance of scratching it. Also, as a general rule, don't leave your drums in the sunlight! Appearance problems in the clear coat will be the least of your worries. If you do a lot of outdoor gigs, or bang your drums around a lot, skip a clear coat and do a wrap. That would save a lot of heartache. Actually, Minwax "Polycrylic" is a waterborne acrylic coating, it goes on somewhat milky, and cures crystal clear. It will not yellow in any way, ever. This feature is very useful if you are putting a clear coat on something that you absolutely do not want to alter the base color on, i.e. a white wash stain, really light color stains, or a colored stain that you want to keep the original color. Polycrylic will make the grain features very sharp and clear, almost like a magnifying glass. If exposed to long periods of direct sunlight, Polycrylic will haze to a milky color - that is non-reversible. But it won't yellow. Polycrylic has very good surface hardness. The Gloss version is approved by Minwax for floor use. Polycrylic has very good resistance to blemishes caused by liquid splashing on it. It goes on pretty thick, and can be difficult to apply smoothly and difficult to sand, but if you want a durable, very clear, non-yellowing finish, and the nice feature of soap and water clean-up, this is a good choice. "Polyurethanes" are a solvent (oil) based coating that use modern cross-linking urethane polymers, and are amber in color just sitting in the can. They will immediately alter your base color. This can be a desired effect, as it adds a visual softness to the surface, sometimes described as "rich" or "glowing". Polyurethane is useful for adding a "vintage" appearance to the surface. Most Polyurethanes will not change color very much over time, darker and richer, but not yellow. Prolonged exposure to sunlight will cause them to get hazy and milky, that is non-reversible, like the Polycrylic. It could get kind of yellowish, but the hazy will be so bad, it would not matter, but have to be fixed. Polyurethanes have a very high surface hardness, great tolerance to incidental liquid splashes and, although fairly thick in viscosity, are relatively easy to apply as the slower dry time lets the film level out if you brush it on. However, this same slow dry time, can be problematic, dust can settle on it before tacking up, and the thicker wet film can sag and run. Also, the smell, and the clean up with mineral spirits can be a hassle. "Varnishes" and "Tung Oil" are old fashioned "tall oil" finishes, a mix of petroleums, linseed oil and other penetrating resin type solvents, but generally pretty light on hardeners. Varnishes and Tung Oils are not used on cabinet grade (kitchens/baths) wood much anymore, as they have poor surface hardness and poor resistance to moisture (liquid splashes). These clears are mostly used on antique or high end furniture for that very soft, glowing appearance. Varnishes and Tung Oils have a very similar appearance to polyurethanes, maybe even "richer", but with slightly less clarity. Varnishes and Tung Oil are very easy to apply, you can wipe them on with a rag, foam brush them, regular brush, or spray. They do not go on very thick, and Tung Oils especially have a tendency to absorb into the wood, so many coats are necessary to achieve an acceptable film depth. This will cause long cure times. Varnishes and Tung Oil have pretty poor resistance to sunlight and liquid splashes, keep whatever you coat with these products away from both. Nitrocellulose Lacquer, or the type of lacquer that a cabinet-maker might use, is very similar in appearance to polyurethane. It will have an amber hue to it straight from the can. Again, if you are going over a white wash stain or some other very light, whitish color, this will be noticeable, and possibly unacceptable. Otherwise, lacquer imparts a "rich" or "glowing" appearance like polyurethane, but with much more clarity. In general, lacquer is considerably clearer than polyurethane, but it will get hazy and milky with prolonged exposure to sunlight. Strange thing is, lacquer will get very yellow in areas that have no light exposure at all, like on the back sides of cabinet doors. But this is somewhat reversible, if you put the surface back into a general ambient lighting mix, the yellow will mostly fade away. In general lighting mix exposures, lacquer will slowly amber over time, but not to an extent that you could say your surface has "changed" color. Lacquer has very good surface hardness, and very good resistance to liquid splashes, although prolonged exposure to moisture can cause "white rings" (remember Mom's coffee table?), and unmatched clarity. Lacquer goes on pretty thin, depending on your application method, and can take many coats to build a nice film. It does take a long time to cure when many coats are applied, the lacquer film slowly shrinks thinner over a period of two weeks to 30+ days, depending on the film thickness, and the ambient air temp and humidity. Like any coating, as it cures, the solvents trapped are released, and the film gets thinner, and it settles down around any texture in the surface it is on. This is why it is good to wait 15-30 days no matter what you use for a clear coat before your wax and buff stage. If you wait a few weeks, you will probably be able to see some texture that you will want to wet sand smooth a final time (steps outlined in other posts) and then wax and buff. Wax does not add much of a film over the clear, so if it develops texture as the coating shrinks, you will then have to remove the wax, and wet sand. Lacquer applies very nicely...as long as you spray it. It's the only option. This might seem to take it out of hobbyist range, but lots of hobbyist spray it, either through a spray gun or in the form of aerosol cans from Behlen's etc. High Gloss Finish PDGood: A high gloss "smooth like glass" finish is probably the most challenging finish to do. All of the pores of the wood have to be sealed and many layers of finish must be applied and patiently sanded with progressively finer sand paper. Additionally, gloss shows dust and flaws more than other finishes. The color "black" in particular is difficult because it is mirror-like by itself and when combined with high gloss is the worst case scenario for showing the tiniest imperfection Despite this, high gloss, glassy finishes are very popular and extremely beautiful when done properly. It's the finish that separates the pros from the amateurs. If you're doing your first finish, this may not be the best place to start. Jarick: If you're looking to do a high gloss finish, satin (smooth) finish, or paint, it's almost a must (to use sealer). You apply a few coats of sanding sealer, sand it smooth, then a few coats of your top coat (and wetsanding and polishing). Salt_Lick: I recently started the finish on my drum. I used Formbys high gloss finish. Let me say this. This was my first time at using Formbys high gloss and even though I did only put 2 coats on it I was not impressed. Formbys is very runny. You gotta put it on lightly or the stuff runs down the shell. Since it's high gloss, anything and everything shows up in it. Any small speck of dust, any scratch, anything. Plus, unless you really sand very evenly between coats you get extremem high and low spots. So the shell winds up looking really shiny in some places and dull in others, it was very frustrating. Anyways, what I learned is for us that know very little about applying finishes, Formbys high gloss is not the way to go. I would say go with Formbys regular. You really gotta know what you're doing when you apply high gloss to get it to look good. rhjanes: Gloss is a pain because it shows everything. Try a high gloss black finish sometime!!! Those show car guys with black are about insane when they finish one. Black is like a mirror. Gloss is tough because it shows everything. Formby's is a lot runnier than Minwax. My only problem with Minwax was the can sucked. Went bad after a while. I think I'll keep my Formby's empty containers, and put Minwax in them!!! jrfrond: When I worked at Steinway, we sprayed multiple coats of nitrocellulose lacquer, which was then allowed to cure for THREE WEEKS before final wet-sanding and polishing. But this was for pianos that sold in the five-figure range back in 1978. Production schedules of modern musical instrument factories demand catalyzed polyester for many reasons. First of all, it is super-hard, which means it can be buffed to a high-gloss quickly on buffing jacks by even relatively inexperienced personnel, sometimes with little to no wet-sanding. Secondly, you won't have the EPA knocking on your door because polyester lacquer is almost 100% solids, with no solvent content. BUT, you DO need a spray booth and personnel trained in the spray application and maintenance of the equipment. Like I said, it's nothing to mess around with at home. One can turn out a DECENT black lacquer finish with canned lacquers, but canned lacquers contain plasticizers to help them flow, and the result is that they are somewhat soft. You can only buff them so much, and then they melt. Part of the problem is that black lacquer shows EVERYTHING, poor prep, poor sanding, runs, bumps, you name it. If you want to MATCH a commercial finish, you need to have the lacquer sprayed and buffed professionally. There are some things that you just can't get around. Resin Finish meinl_aa: I'm thinking to use resin for external finish. How about your opinion or experience? sweetdrums: What type of resin? Fiberglass? tbone: Unless I'm mistaken, resin is self leveling, which you can't do on a drum shell. shiloh: A resin finish could be done on a round surface, you must have the shell on a rotisserie. I used to make fishing poles this way, epoxy over the lashings, then used a rotisserie to keep the pole turning while the resin cured. Turned out perfect every time, no runs or sags. So if you can figure a way to keep the drum shell rotating while the resin cures, (slow turning not fast), it`ll work fine. sweetdrums: I use a polyester resin to fix surfboards. I have started to use it on drums as well, for filling large holes. I use a UV curing polyester resin that you apply in the shade on a sunny day. Direct sunlight on a nice day will make the resin hard in seconds. A huge advantage for getting an even finish. It sands well also (ever see a surfboard before?) I am going to try to make my own version of a wood/fiberglass shell. I think you could apply several light coats on a cheap soft wood and get it to sound more like a hardwood or acrylic shell. The stuff cures crystal clear unless you add fillers or dyes. hippybaker: I was just thinking of how to pour like, thick 2 part epoxy onto a shell... I came up with something simple and cheap and easy, but haven't done it yet... If we use a board, like the one some of us use to hang a shell while drilling, and then put a kid's motorized car on it, upside down, and then a couple of guides on each side to keep it from rolling off... I don't know how it will work.. I was planning on trying it with the 2 part clear epoxy stuff.. which I've yet to play with. Any thoughts? rpm's, foreseen difficulties? sweetdrums: I can tell you that I have worked with the 2 part epoxy, as well as the 2 part polyester. I have quite a bit of experience with surfboard repair. The 2 part stuff can take a long time to cure. Even when I use more catalyst than recommended to speed up the cure on polyester its nowhere near as fast a cure rate. I don't think I'll ever use the 2 part again. If it is sunny and warm enough, the UV curing polyester cures almost instantly. I have had no problems with any of it "running" during cure. Also, the benefits from being able to apply the resin in the shade and start the cure when you are ready (by sun exposure) is a huge benefit. I can't emphasize this enough. It gives you so much more control of the resin. There is no mixing of any kind with the UV cure. One less thing to screw up. tbone: Sounds like a cool method - can you say where & what to buy? sweetdrums: I get mine from surf shops. If you don't have any near you, try a surfshop online or just search the web for UV resin. You should be able to find both polyester and epoxy types available. You will also find some "how to's" on youtube and such. The epoxy is supposed to be stronger, but it is harder to sand and finish. Probably overkill anyway. The polyester is very strong and sands easily. There are tints that can be added for an opaque look. They will take longer to cure though. I know you can buy the 2 part stuff at home centers. I'm not sure if they sell the UV curing type or not. Boat builders or boat dealers might have access as well. Also I believe you can add a UV stabilizer to the standard 2 part stuff as well converting it to a UV cure. But then your mixing again. Some names from the surf industry are: ding all sun cure Solarez hippybaker: Do you think it needs ACTUAL sunlight, or do you think I can use the HPS light from my garden to cure it? Edit- Wow, I had never seen or heard of this stuff before... It seems wonderfull... lay/pour/trowel, it on, and then play with it as long as you want, and then when your ready, zap it hard with a UV light. sweetdrums: You can use a UV light, but I would assume the strength of the light would affect the cure time just like the clarity and warmth of the sun would on any given day. Weak light = slower cure. I try to do this type of work on a warm sunny day. Red Dye Issue ohheycheckmeout: (I'm) finishing a snare with a red mahogany dye and I am using minwax polycrylic on the other drums. Reading the label on the minwax, it says not to put it over anything red, as the dye will float, I'm guessing the iron. Anyone tried this before? Any other alternative? Tung/Maloof and so on? J.Richard: Don't use the polycrylic. Dye/Stain the drums and seal the wood, 2 coats, then lightly sand with fine grit. I'd use lacquer or Tung Oil. Polyurethane Over Tung Oil I like the idea of using Tung Oil to make the figure in wood really "pop", but wondered how long I should wait before applying a topcoat. I asked on several forums (here and GhostNote) and got different answers with the majority topcoating once the Tung was dry to the touch. There was enough mixed opinion that I called Minwax (the makers of the Tung Oil I had purchased) and asked for their tech guy's advice. He said to wait 14 to 21 days for a full cure, then scuff lightly with 220 grit sandpaper so that the Polyurethane (my choice for top coat) would have something to adhere to. I probably shouldn't question the experts but 220 is pretty coarse and I don't see how that would work in this situation. While it would prepare the wood nicely for poly, it would scrape up the tung oiled shell more than I care for. I used 600 instead. Matte Coating A lot of woodworkers like to use gloss topcoat and then use steel wool or some other method to create the matte finish. The reason being that the matte ones can sometimes get yellower over time. More so than the gloss ones. Sanding Lacquer lickydrummin: I've stained it, and put on about 5 coats of Deft spray-on Sanding Sealer for Lacquer. After letting it dry, I sanded it with 320 until most of the surface was evenly dulled. There were some thin areas dispersed over the piece that were a bit darker (low spots). I went ahead and cleaned all the sanding dust off with a barely damp cloth and have let it dry thoroughly. At this stage, I have come up with these questions: 1. Should I worry about trying to sand the Sanding Sealer until I get a 100% evenly dulled surface at this stage? Or should I let that resolve itself as I apply my 10-12 coats of lacquer? 2. When I sand in between coats of Sanding Sealer or Lacquer, how much do I need to worry about fine sanding marks and scratches and dullness being set in? 3. I've seen some discrepancy on this, so I'm wondering what grit everyone recommends for sanding between coats of Lacquer? I've seen 320, 400, 600, 800... so it seems to be a pretty wide range of opinions on that. Any clarification? rhjanes: 1. I'd put on another few coats and sand that back down again. Those areas you are describing, are lows. 2. No. Lacquer actually melts into the prior coats. DEEP scratches, yes, sand out. sanding scratches, not to worry. 3. Sanding the lacquer is for two different reasons, hence the different grits. a. if you are spraying on lacquer and then need to sand out some runs, drips, bugs, dust, imperfections, then use 320 or 400 DRY. Wet/Dry paper is fine, but sand it dry. Use a sanding pad to back up the paper. b. If you are done spraying the lacquer, you are moving on to the polish. lacquer likes to dry quick, but with "orange peel" texture to it. To smooth it, you WET sand. Wet sanding progresses to finer and finer grades. Start with 600, move around the shell about 2 or 3 times. Then, move to 800, 1000, 1200...then, polish time. The shell after the sanding will be all dull and foggy looking. But after 4 minutes with a buffer/polisher.... Polishing Don't wait too long to polish poly because it gets harder than lacquer. Lacquer is sooooo easy to polish. Poly is a bit stubborn sometimes especially if you're used to lacquer. Once you get it polished though, it will last. Lacquer always develops little tiny cracks through it with enough time. Lacquer is not high gloss. It has to be rubbed out to get that deep gloss. To apply it, you put 3-4 coats on, let it dry over night, sand it, put 3-4 more on, let dry, sand. When you get it like you want it, then it has to dry down for a minimum of 10 days before you can buff. And lacquer never "cures". The solvents continue to evaporate and continuously shrink. That's why you may have seen an old set that the finish has cracked. Urethane clears on the other hand - spray 2-4 coats, wet on wet, and walk away, 1-2 days later . . .DONE! It doesn't have to be buffed for appearance, but usually there will be a couple of specks of dust that has stuck to it, so you just lightly "nib" it, polish, and it's ready. Urethanes have a catalyst that is added so they actually cure. So, they don't shrink and they are much more durable. They can also be flattened for a satin look as well. rhjanes: I've got a gloss tung stave shell and I wanted to wet sand it and polish it. Here is a step by step version with pictures: http://forum.drumshed.org/showthread...ight=polishing Just in case that link gets lost, here is the text: Step one. Picture one is the shell sitting in my utility sink. It is sitting on a sponge to keep it from getting scratched. I've got about 1200 grit paper folded in thirds and using my 3M backing sponge pad. Note the dripping water to flush the paper and shell clean. I sand over the shell once lightly. Pick a spot so you know where you started. Then, I flip the shell over and do it again. This way, there is equal sanding over the entire shell. I do it with 1000, 1200 and then 1500 grit. Takes about 15 minutes total. Step two. Sanded and dried with a towel - just to check for any more junk in the finish. Notice that the surface is now dull. Don't worry, the polish will bring the shine back. Step three. My equipment Buffer with wool pad. 3M polish from auto paint supply house (one quart has done two cars, several drums and lots of smaller car projects.) and 3M hand glaze which takes out the swirl marks. I attached the wool pad to the buffer and got the pad wettish with tap water. Then, I trigger it on a time or two just to get the extra water out of the wool. Notice the slung off water on my concrete. Do this out side if you can. It gets messy!!! Showing the buffer angle. You want LIGHT pressure. Really, just the pressure of the tool. Careful at the edges. Careful you don't get the cord tangled up!!. I squirt a bit of polish compound either onto the drum (it tends to run off) or in a quick circle on the wool. Then, work this in for a second with your fingers into the wool. Rub the drum a bit with the machine off. Then, start it up. Move all the time with a light touch. Add more compound as needed. But it really does not take much at all. When the compound vanishes, you should have shine left. This drum is sitting on a chair so I could snap the picture. I sit in the chair and hold the drum between my knees, and with my hand, work the drum and machine. Stop, rotate drum, continue etc. Takes about 15 to 30 minutes. Go slow. OK. I finished buffing. I then washed the drum in water, just to get the polish compound grit off the surface. Then, I moved inside to wax it. You can wait on this and make sure your tung oil has cured a week. If lacquer, also wait a week. I have just a small drop of wax. This is Nathan's Liquid Luster carnauba wax. I first used the swirl remover, NOT MUCH, buffed that in and back off. Use torn up terry cloth towels - one to put on, one to buff off. (Wax on...Wax off.... remember that...dang, thought that kid karate just by waxing cars!!) Same with the wax - those few drops did about 20 to 25 percent of the surface. If you use a paste wax, work that into a damp cloth first. Only about a thimble full is needed for an entire snare. You want a barely visible haze from the wax. You can always wax again, but getting on too much is WORK to get it off. You can always back up and re-do any of these steps!! You can even wet sand it and apply another coat of top finish. After this, I went to work carefully sanding down the edges to a nice roll-over. 240, 280, 320 then 400 grit. Then, I will Nathan's wax them. Mark the shell for drilling, assemble etc. by-tor: Do you finish the inside? Does the water screw it up? Would the water screw it up if it was a ply snare? rhjanes: Good question on the inside finish. I sand down the outside to the final grit I want to be at before finish. I sand the inside at 240, 280 and maybe 320. Lately, just stopping at 280. Then, I apply 2 coats, one day apart, of a satin oil. That's it on the inside. That protects it from the water and such. Let that dry a day and proceed with the outside, dye, sanding, whatever. Also, remember you are not soaking the wood. Dribbling water over it to flush the paper and shell. Then, when you think it is sanded. Dry it off real well with a towel. Inspect your handy work. So, the inside doesn't get very wet and is only wet for 15 minutes or so of sanding. Another tip. I let mine sit for a while before applying any tung oil. To speed it up, use a hair dryer on low. Also, compressed air is great for speeding up the drying. Another tip. I have some china markers, which are from the craft store. These will write on the surface of the drum, but wipe right off. If after I sand it, I have several spots needing more sanding. I mark them with a light mark. It stays on while I'm sanding another area of the shell. Once all the marks are gone, I've re-sanded my problems. Dry it, check again. Not too much on the marker as it is a wax and will clog the sand paper also. Wet Sanding With Water The purpose of wetting the sandpaper is to prevent clogging. This is especially important when dealing with fine grits. Not all sandpaper is made for this purpose. Basic steps to sanding with water: Apply poly or lacquer 'till a finish is built up Wet sand with water as described below Machine polish/buff Apply swirl remover MarkleyCustom: Wetsanding is done with water, or water with a drop of dish detergent in it, and is reserved for sanding the final clearcoat. The main reason why people wetsand is because the water acts as a lubricant, which keeps the fine grit sandpapers from clogging up. Without the water, extra fine sandpapers will clog up much more quickly. If you dry sand at the high grits, sometimes without you noticing it, little "corns" of sanding dust buildup on the paper, which can leave larger scratches in the finish - you don't want that. Sandpaper marked specifically for "wet" sanding is used. It is submerged in the liquid and continuously kept wet throughout the process. snaremaster031: Wet sanding itself makes finishes turn white at first too. But that disappears as you progress through the stages. painter213: Regarding avoiding white splotches when wet sanding wipe-on poly: If you're using single component coatings then they require some additional time to cure before they become hard enough to wet sand. If you're waiting a few days, then that might need to be taken to a few weeks. All I use is two component coatings, so they reach a hardness that can be wet sanded in about 24 hours after application. Full Cure in about 30 days. Waiting 24 hours with wipe on poly is not going to be long enough I'm afraid. I would say that you would need to wait several days with that stuff before trying to wet sand. FullCollapse: I used Minwax wipe-on poly and it wet sanded fine. I forget how long I waited to let it harden first. I did get those streaks in it, but after I applied the swirl remover, they went right away and I had a nice gloss finish. I wouldn't use wipe-on poly again though, way too thin and extremely difficult to apply evenly. letusprey: Try scuffing with 000 steel wool between applications and wet sanding once you have the build that you are looking for. It doesn't remove a lot of material but will give enough tooth to adhere. Like Benji has said, TIME is critical to any finish, catalyzed or otherwise. Just make sure you clean the shell before additional coats after scuffing, the steel sometimes will leave some particulate which can cause problems, especially with water-based stuff, it will actually rust. Not pretty. rhjanes: Once you work up from 800, 1000, 1200, sanding with the grain, then you machine polish. After the sanding, first time, you will be thinking you just screwed up! As the finish will be all dull, I mean DULL. But after 3 minutes on the machine buffer, it will shock you how shiny it gets. Swirl remover is used after the buffer. You get that at the automotive paint place also. There are several brands. They go on like wax. In fact, somethimes I don't wax. Wood Magazine: The following is a guide to wet sanding with water from http://www.woodmagazine.com/wood/story.jsp?catref=wd14&page=3&storyid=/templatedata/wood/story/data/226.xml Put about 1/2" of water in a shallow plastic tray and add a couple of drops of liquid detergent. The detergent, by reducing the surface tension of the water, allows it to more effectively wet the sandpaper and the tabletop (in our case - drum shell) and be a better lubricant. Dip 500-grit wet/dry paper backed with a rubber sanding block (available at hardware stores and home centers) into the detergent solution and work the surface in a circular motion. Be careful not to over-sand the edges. Keep the sandpaper wet with clean detergent solution. Periodically wipe the surface dry to inspect it. When the surface has a uniform dull sheen, wipe it clean with a damp sponge and let it dry. Apply a second coat of finish and let it dry overnight. Wet-sand again as in Step 4 and wipe dry. Now apply a third coat of finish, but this time, let it dry two days to make sure the entire film of finish is dry. Just as in Step 4, wet-sand the surface, this time starting with 1000-grit wet/dry sandpaper, progressing to 1500-grit and finally 2000-grit. Buff with a clean, soft cloth. Get out the car wax and apply and polish it according to the directions. Sanding Direction When sanding wood, always sand with the grain. However, if you're sanding a built-up finish such as lacquer or polyurethane, some people recommend sanding in a circular motion. Use a pad beneath the sandpaper for even results. Buffing rhjanes: A buffer can be had for about $40 USD. Try a pawn shop for used ones. You only need one wool bonnet for it also. They spin at about 1500 RPM (slow, but way faster than doing it by hand). I think the few people who have tried doing it by hand gave up and bought a buffer. You also need some fine polishing slury (buy at the store). And then apply the anti-swirl (takes out the polishing marks) by hand. On the Rock: I have just wet sanded my poly, and now I am rid of the orange peel, as well as the sheen. I am now trying to buff with my random orbit buffer. I'm wondering what type of 'slury' do I need to buy. I am also wondering if I need to go buy a new rotational buffer, or I can utilize my random orbit buffer, which basically just vibrates real hard. I'm also using a terry buffing pad, which basically just feels like a faceclothe, an I think that's the right one, but could someone confirm? rhjanes: http://reranchstore.stores.yahoo.net/finitiipolco.html Reranch can be expensive. Visit your local Auto Body paint supply house for polishing compounds. 3M, Meguires, all good stuff. NAPA also will carry it, but might not be "expert" on what you need. On The Rock: Polishing compound, got it. And 3M also makes the swirl remover right? Any thoughts on the buffing pad? I've seen people use a thick wool one... Rhjanes: Yes to the anti-swirl also (I hand apply that). I use a 1.5 inch lambs wool bonnent. The Shrinkage Issue painter213: All I use is Activated Poly. Mostly House of Kolor UC-35. Love IT!!!!!! No problems YET!!!! But I do have to say that Poly does shrink as it cures. Unless a coating is a 100% Solid content coating then there will be shrinkage. If you put a solvent into it, then that solvent is going to come out. With that process, you have shrinkage. How much just depends upon the solid content of the coating and how much extra solvent that you add. The more solvent put in, then the less solid content of the coating. By the way, an example of a 100% solid coating would be a Rhino Spray in Bed Liner. Cures in about 5 seconds. Lou Rolls: Even with a 100% Solid, it will still shrink. The chemical re-action which causes it to 'Cure,' causes the paint to 'Pull together' molecularly. It's known as 'After shrinkage'. The shrinkage by evaporation is substance release. painter213: I have to totally disagree with that statement. 100% solids do not shrink during cure. They have NO solvents. If you apply 20 mils then it cures to 20 mils. I have dealt with these coating for over ten years and they do not shrink. There is no release of substance. The compounds are Poly and Isosionate. Isosionate is the curing compound. These coatings spray with specialized equipment and the two compounds do not mix until they exit the gun at high pressure. A Simple Wax Finish (no polyurethane or lacquer) rhjanes: I'd try something like Maloof Oil/Wax product. Apply, sand it in while still wet. Wipe dry. Repeat for the next three nights. DONE. Nothing else. Nice satin finish, protected, and waxed! (You can shine it more with 0000 wool and some lemon oil. Or, apply some carnuba liquid wax). Automotive Detail Wax mrpercussive: This might be a stupid question but as for wax, does auto detailing wax work? Dennis Markley: I've used spray detail wax on finishes and chrome for years with no ill effects. Should not cause any harm - there are no abrasives in the detail wax products. I've used Meguire's detail wax, and my personal favorite, Griot's Garage detail wax. mckenziedrums: It will give it a shine but offers no real protection since it won't build up a hard film. I've used it in the past and I can tell you a finishing wax like the Minwax paste wax works MUCH better. As for the edges, no... auto detailing wax will not work there at all really. Wax Alternative PDFrogman: Forget wax, go to: www.zainobros.com They make an automotive polish that's out of this world Easy to use - has an SPF 40. It's a three part system Z1 show car polish lock Z2 show car polish for clear coat Z6 gloss enhancer spray It's a great product - I use it on my cars and drums You use Z1 once a year. Z2 I use at least once a month (on my cars) and spray enhancer after every wash. As for my drums I do Z1&2. Every once in a while I do Z2. The more Z2 use the deeper the shine and the gloss enhancer very frequently. Z1 & Z2 last a very long time you'll use Z6 more often as long as you keep them in a climate controlled area they last for ever extreme cold and heat (car trunk) kills the shelf life. I wouldn't use it on an oil finish. Spitcoating From an article by JoeWoodworker at http://www.joewoodworker.com/spitcoating.htm and brought to the attention of Drumshed by TheIronCobra 1. Brush on a full strength coat of gloss polyurethane (oil based) and let it dry. This is the base coat from which you will build upon. 2. Lightly sand with 220 grit or higher to remove any dust in the finish and wipe down the project with a tack cloth. Then brush on a second full strength coat. 3. Lightly sand the project again and wipe it down with a tack cloth. 4. Dump some of the polyurethane into a glass jar and add an equal amount of mineral spirits (you can also add a 1/4 cap-full of Japan drier if you want). 5. Take 3 paper towels and wad them into a ball. 6. Wrap a clean, unprinted cotton T shirt around the ball of paper towels. We'll call this the "applicator". 7. Dunk the applicator into the glass jar and press the applicator against the jar side to squeeze out any excess polyurethane. 8. Wipe the polyurethane on to the surface in one direction with the grain. Start and finish each pass in one long and even stroke. 9. Quickly return to the top and wipe a new path of poly trying not to overlap the previous path by more than a half inch. Reload the applicator with polyurethane as needed. You want it to put down a wet, flowing coat (but not so wet that it leaves heavy ridge lines. 10. Continue doing this until entire work piece is covered. DO NOT re-apply the poly until the previous coat is dry even if it looks streaky. Failure to follow this step will screw up the finish. 11. The first coat may take an hour to dry. After it is dry, lightly drag a straight razor blade along the grain of the wood at a 70 degree angle. This will pull up any dust flecks without removing the finish. On curved areas where the razor blade will not go, use #0000 steel wool. Then wipe the project again with a tack cloth. 12. The subsequent coats will dry within 30 minutes (or less). Apply at least 5 coats. On my dining room table I did 25 coats over the course of two days and it looks incredible! 13. Even if you wish to have a flat or semi-gloss sheen, it's best to use gloss polyurethane, as it is (supposedly) a chemically stronger finish than semi-gloss and flat. To bring the gloss down to flat, use #0000 steel wool. To bring the gloss it down to semi-gloss, use rotten stone powder mixed in water and a wad of T-shirt to rub it down. To really bring out the gloss, wait 2 or 3 weeks and buff the surfaces with a fine automotive finish such as 3M Perfect-It polish. snaremaster031: Alternate #6 - An old pillow case, sheet or dress shirt with a high thread count fabric instead of an old t-shirt will save you a lot of time messing with little "pickys" that can come out of old cotton if the finish starts to tack up a little during the finishing process. (Unless it's silk or some other fine fabric.) Just don't use the wife's good sheets or something with previously unknown sentimental value. Creating A Sparkle Finish sumojoe14: Steps: -Prime drums black or white (black makes the flake take a darker shade, white does the opposite) -Sand up to 400 grit -Mix metal flake with topcoat (lacquer, poly, or waterborne. It's all up to you) -Spray on multiple coats waiting the recommended time in between. -Spray until the flakes cover the entire shell (no primer showing) DO NOT SAND INBETWEEN COATS! You will sand the flakes and make them dull. -After the flake has covered, go straight to the topcoat. Spray at least 4 coats before you start sanding it level. You will have to do a bit of sanding to get it level, don't get too much guts when sanding though. Once you are close to being level spray more coats and do it over. -Once you are level, spray at least a couple more coats and let it sit for a week minimum. -Finish sand and buff -Wait a month then wax Take into consideration how many coats are being applied. The longer you can wait to finish sand and buff the better. There is a lot of gases wanting to get out. I asked Gheeley how he mixes them a while back and this is his response: I don't know exactly how much flake you will need as I buy flake in bulk, we buy it in 1kg bags per color. I'm guessing 250ish grams for 4 pc. I'm in the UK & I have a water-based clear coat made up for me again I buy direct from a factory, any std issue clear coat will be fine, but make sure you get the right flake to go with the lacquer, when I buy flake I have top buy one designed for use with water-based. I would imagine deft would be fine I hear their name a lot but have never seen it over here. Like he said there are many people that make metal flake. Just find an auto paint store ask them for it and ask them if it is compatible with your topcoat. Things to keep in mind: -There are many sizes of flake, make sure your spray tip is big enough (the paint store will know) -Lacquer or waterborne topcoats are better for this than poly. They burn into one another instead of having to sand for it to adhere. -This finish takes a long time to do compared to other finishes. -When you switch from sparkle to topcoat what you are doing is filling the gaps from the sparkle. -Once you are level and spray a couple more coats to finish sand you are leveling out the orange peel. This is what I have found. letusprey, markley and Gheeley all do this finish extremely well with different processes depending on their topcoat. Find one that you like more and stick to that process. painter213: If you try to use Lacquer you will be applying 40 coats or more to cover the flake. Lacquer has very little solids in it. And it will take forever for it to shrink down completely. Use a high solids polyurethane. After you have all the coats applied, you had better let it sit for 30 days so the coating can shrink down and around the flake, unless you are set up to heat cure or UV cure your coatings. Then you can level sand and buff it out. If you do not wait long enough and you level sand and buff, then in a few weeks you will have little bumps all over your shells due to the coating still shrinking. Most of my work is with flakes and this is my process. If you use a good source for your coatings, then they can give you more advise for the coating that you choose to use. .:On The Rock: To do a sparkle finish, (I'm pretty sure I'm right about this) I can spread the flake onto a wet poly/laquer with my hands, without a spray gun. The compressor I have cannot handle a gun with a large tip, and I want a large flake. I've seen this done with good results, being sure to do this over several times. Another thing, can I use sand sealer for a while after finishing the flake? I would think so because it's essentially a high solids poly, so that it will fill the lows quicker than just using poly, right? Also, how would I go about getting my hardware that satin look ala DW? I've heard that they do it by sand blasting (I can't tell you where I heard this to). So maybe I can find a local shop to do this for me? Or can this be achieved from powder coating? I've always had trust issues from powder coating because it just doesn't seem to hold up to the pounding. rhjanes: On the sanding sealer, I take it you are wanting as smooth a finish as possible? Use it first. It seals the wood, the pores and grain. Then, apply the top-coat. Yes, you can spray on the poly, sprinkle on the flake and let dry. This won't give a totally "pro" look. Sparkle is all at odd angles when suspended in the paint/clear. That gives it the effect. Once it dries, then you will need to continue to clear over it to level it off. I'd not use sanding sealer after the initial leveling of the wood. Sand smooth. Seal about 3 coats. Sand it down, repeat (3 coats, dry, sand) until it is as level and smooth as you want. koko: Sandblasting can be a way to do it. You have different kinds a grit and even blasting with a water/grit mix. The grit can actually be sand, but also glass is used. You actually can do this yourself, but you need a booth to do it. Go Google for sand blasting cabinets to see it. (Not much more as a box with a glass panel to see what you are doing and long rubber gloves for your hands). When I did my 1960 motorcycle I build one myself and found it not to hard. Experiment with the grit and the power before you go. Carpenters use BIG spray-booths and might be able to help you out. .:On The Rock: I don't really want to go buying sandblasting stuff when I don't really need much more than these done. Is there anything I should coat them with after to stop oxidation? koko: Apply a clear coat within the next hour. (Not joking) I would try a car painter, talk the guy into your thing and try if he allows you to monitor it closely or bring a sample with you. .:On The Rock: What will happen if I leave it too long? rhjanes: It starts oxidizing...microscopically. Here's a trick car restorers do. Blast it. (You'd take it home next). Place it into a warm oven for about 30 minutes. Remove. Let cool just a few minutes. Hang them up with some wire coat hangers and spray them. Eastwood supply makes a nice "Nylcon" (something like that) clear. But Krylon clear or Duplicolor is also good. .:On The Rock: But what's the point of putting it in the oven? Can't I just bring it home and spray them right away? What oven temp should I use - and should I spray them hot or cooled? rhjanes: It cooks off any moisture. About 250 degrees for maybe 20 minutes. NO Plastics! Make sure everything is all metal. Use a mitt to handle them. By the time you take them out and hang them up, you can spray them. You CAN just bring them home and spray. 95 percent will do that.... BTW, if you handle them much, then the oil in you hand will also be on the surface, and in the case of a satin finish, will be into the pores. This can also cause adhesion issues. Get a can of spray on brake cleaner from your auto parts store. Just lay the parts, spray. Using latex gloves, turn them over and spray again. Let dry (it flashes off quick). Hang up and spray. koko: Ray, are you sure it is after the sandblast? I just remembered with my motorcycle parts they heat it up before the blast to boil and burn out any grease or the like stuff. I guess doing both is the best thing to do. rhjanes: Heating after is to evaporate moisture is all. Sandblasting can often have water in the air. Even with a quality drier. Compressing air = compresses out the moisture. Add in, that air is humid. I've seen smooth sheet metal start to oxidize in just hours. Hence, heat it, apply the clear. koko: Yep, now I got it. Heat it after blasting is first priority. Sparkle Fades jbfrench75: As I have understood, you have 2 methods to do a sparkle fade: - You make the fade first and after you apply sparkle with clear coat. For that, you have to use (for a silver/black fade) silver and black flakes -You apply the first color and the flakes (silver color and silver flakes) and then you do a fade with a candy paint I'm not good for all of that, but I think the 2nd method should be better. The Re-Coat Window Bdrummer brought up the question of no sand recoat window. Since I was unfamiliar with this term I did a Google search, which revealed this definition: Re-coat windows apply to enamel paints and refers to the time period during which a second coat may be applied. After spraying the first coat of an enamel, a second coat must be applied with in 1 - 2 hours or wait 5 days for the coating to cure. The paint may wrinkle or lift when re-sprayed during this curing period. Lacquers do not have a "re-coat window." Subsequent coats of Lacquer can be applied over a Lacquer finish without wrinkling or lifting due to a "re-coat window". Another search yielded this: Lacquer materials dry entirely by the evaporation of their solvent. The dried film will re-dissolve in its original solvent for an indefinite period of time; no chemical reaction occurs to alter the properties of the film. Generally, Lacquer topcoats are easy to use, fast drying, high gloss, durable, and easy to buff. Lacquers have no re-coat window. Enamels dry or cure through oxidation and polymerization, which is the combining of individual molecules to form larger molecules. This new film will not re-dissolve in its original solvent. Generally, enamels are very durable, high gloss coatings. crankz1: Typically with urethanes, if they cure, you need to scuff to promote adhesion for subsequent coats. sumojoe14: Polyurathanes wont offer a "no sand re-coat window" which is called burn in. Waterborne and lacquers are about the only major ones that do. Other-wise you will have to sand between coats. not much just scuff it up so the next coat will stick. koko: Glitsa vloerlak(verdunbaar met spiritus) is a re-coat window sealer. I don't know the exact translation for enamel, but do know that Glitsa allows for a 16 hour period max between layers or SIX WEEKS! |
| Opfor's Method of Applying Graphics |
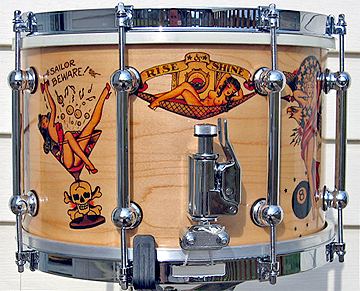
|
|
jontheodore: I have an awesome mural created by an amazing artist friend of mine that I want to put on the drum when its completed. ...What is the best way and/or the best material/plastic/product to use to print the image onto so I can wrap it around the drum? jbfrench75: Someone around here (don't remember who) did a snare with tattoo graphics printed on a transparent adhesive paper with laser printer and put on some lacquer (or varnish)...it worked well in fact. OPFOR: That was me! You can get the waterslide paper online and then print whatever you like on it. Make sure you use a printer capable of the highest quality output or take it to Kinkos and let them run it for you. It is easy to use and looks terrific under lacquer. PDGood: Link to Waterslide paper. http://www.misterart.com/g8575/Lazertran-Waterslide-Decal-Paper.htm?WT.mc_n=froogle&WT.mc_t=CPC&WT.mc_id=8575 Finishing the Inside of the Shell morbido: I was wondering if there is anyone out there that puts any coat on the inside of the shell? To protect the wood from father time better. Any thoughts on this? altereddesigns: I sometimes use some blonde wood wax, seems to give a slightly warmer tone. Also nice and easy. Sam Bredeson: Usually, I put at least one (more often three) coat of varnish. I've also used Vaseline. rhjanes: Usually a wood oil. A coat of lacquer is fine also. JLee: Three coats of tung oil. Shuffle: Any idea what kind of interior finish on birch shells would bring out some mid-range freqs? JLee: Not sure you can really break it down like that. I know that if you OVER seal the inside, and go for too much gloss, it accentuates the highs. I think you would probably be best off sticking with a minimum of product for the inside, like maybe a couple of coats of satin inside tung oil. bobober: ...for an inside oil coating I was thinking (about using) tung oil. I just wanted to double check my method: 1st coating Light sand Then 2nd coating Is that it? rhjanes: On the inside, you don't even need to sand between coats. Just wipe it on with an old cloth and let it sit about 5 minutes. Then wipe it dry. Wait a day and do it again. If you want, you can also sand it while it is wet. I do that. Apply it, take some wet/dry sand paper, inside, about 280 or 320 grit is fine enough. Then, just sand in the oil. Wipe your hands off and then wipe the inside and you're done. bobober: Ok, alright thanks but one more question - when you sand the oil is that to sand the oil into the wood? rhjanes: Yes, you apply the oil and a few drops on the black, wet-dry paper. Then, sand with the grain (It's messy). The oil will sand into the wood. The paper will start to drag. I do that for maybe 15 minutes. adding oil when it gets too dry and draggie. Then stop and start wiping off the excess (which isn't much!). Let it dry over night and do it again the next day (or night). Let it sit and dry again. Then, do what ever is next in your assembly (exterior). mfp1016: An oil finish of only 2 coats, despite wet sanding, will essentially do nothing except temporarily color the wood. It's about as good as natural wood. Tung oil needs at least 8 to 10 coats before it has any sort of protective properties. Also, make sure you're using 100% tung oil, not a tung oil finish (ie Formby's). ebuzzcut: I remember seeing some drums that were finished on the inside and the outside. I was wondering what kinds of finishes these were done with, and how it affects the sound. rhjanes: (On the inside) I use three coats of a wood oil. Maloof, even just boiled linseed oil. I also only rough sand. Sand the inside at 100 grit (dry sanding the wood). Apply the oil, wipe off the excess, let dry over night. Repeat at least once more. Tone changes? No idea. You should always protect the wood. ebuzzcut: I was talking more about using a lacquer or satin stain on the whole shell. Sam Bredeson: Lacquering the inside would make the drum sound brighter, with less of the woody character. I think it tends to make the drum sound towards an acrylic. I used to put fewer coats of whatever I was putting outside on the inside of my drums, but lately I've been using Vaseline (which works great, but has to be re-applied every few months). gabbagabbahey: In a picture of Phil Collins' drum kit the shell inside is painted. What's that exactly? Does it change the sound ? rhjanes: .... silver paint. Gretsch used to do that....thinned down boiler paint. Some will say thinned down zinc fence paint. Gretsch was based in NYC, so to me, boiler paint makes the most sense (stuff was close at hand from all the steam boilers heating buildings). Most any drum, has a finish to protect the wood, even the inside. I do mine with a wood oil, boiled linseed, something like that. does it change the "sound"....well, yeah. But so what. unprotected wood won't last. JLee: The more thickly the shell is painted, the more likely it would be the sound of the drum head and not the shell that dominates the sound. Even with a barely finished inside shell, a lot of what you hear, is initially the head. I do think that an overly finished, shiny smooth shell will not "hold" the sound the same way. Probably emphasizes more attack. Kanbasher: Gretsch has been using the silver paint sealer for quite some time. It's one of the recognisable features that are unique to Gretsch. My thinking is that putting a glossy finish inside the drum may make it more reflecive to the sounds coming from inside the shell. Not a proven theory though. Protecting the Edges and Insides From Paint mega: ...how do you get the paint job so clean at the bearing edges and not get any on the inside of the shell? rhjanes: ...there are a few ways to keep paint off the inside and bearing edges. Tape is one. It can be removed easily. Others just use a wood oil first. The paint won't stick to that or will come off easily when wiped with some more oil or Pledge. The inside, probably painters (blue) tape is best. On the edges, many cut the edge after all finish work is done, so no worry about finish on them, since they don't exist. The others (like me) just sand them after the fact. That sanding removes any finish on them. Veneer There are several ways to apply veneer, but in all cases, pressure is needed. Professional cabinet makers and other wood workers typically use a vacuum press. But a drum shell is round and sometimes thin so it poses some problems for this method. Many independent drum builders use a heat cure glue - you apply the glue to both surfaces, let it dry, and then iron on the veneer using a standard household iron. A wood softener can be very helpful. They advertise that after using it you can wrap a piece of veneer around a pencil. I haven't tried it to that extreme but it is amazing stuff. Below you will find information about the various veneer methods and products. DISCUSSIONS FROM THE DRUMSHED FORUM: CSpencer: Here's the way I see it: There are two ways apply veneers. The preferable and much more expensive way is to use a vacuum bag. You glue the veneer down, then put it in a bag and suck all the air out. This flattens the veneer out all around the shell and makes it look real nice. The other way is the "iron on method." Here's a great tutorial: http://www.joewoodworker.com/veneering/iron-on-veneering.htm That site also sells all the supplies. The great thing about ironing it on is that it's cheap. When ironing on the veneer be careful not to create too much heat in one place. You'll melt the glue holding the shell together and end up with an egg shaped shell, or with your plies separating. Believe me, I've done it. p.s. www.joewoodworker.com also sells vacuum supplies. ...gach: A few weeks back I veneered my 8" snare shell in bamboo... My way: My dad is a woodworker and brought home a product called benderboard...I'm not sure where they get it, and am not sure if you can just pick it up anywhere...but anyways this benderboard is pretty much just a piece of really bendable wood...so I cut the veneer to size leaving it a little wide which can be cut off later...spread glue on the veneer (I used Titebond 2 wood glue or something)....wrap the veneer around the shell lining up seam nicely, then wrapping the benderboard around that, and using one long strap, strapped the shell a couple times around and ratcheted the strap tight, doing this while keeping an eye on the seam....then just let it dry... Now this being my first veneering job on a shell, the seam wasnt the greatest....but there is hope...Minwax makes a stainable wood filler in little bottles, this stuff is perfect...so I filled the seam with it and sanded flush...viola, no seam...now bamboo has a vivid straight grain pattern and I had my grain going vertical also, so it really just disapeared, AND, I dyed it yesterday, and the filler takes the dye just as good as the wood....good product! tcraw1010: Can someone explain to me, in the context of this thread, what a "veneer" is and what makes it different from any other wrap ?? gheeley: TOM, a veneer is nothing like a wrap!!! Basicly it's a thin sheet of raw wood, it is what ply wood is made of, it is thinly sliced off logs or in many cases peeled off the log like peeling potatos. Plywood drumshells (and other plywood) are made from raw wood veneers, sandwich veneer together and you get ply (this is why I dont get on with the term 1 ply, you have to have 2 to have any plys). lolitsafish: I am currently re-wrapping a drum kit in beech veneer. How do I apply pressure without a vacuum bag thing? What glue should I use? PDGood: I used Joe Woodworker's heat cure glue and ironed the veneer on and it worked great for me. Others say they got the same results with regular wood glue. A few things I can tell you: It helps to apply a softener to the veneer, but expect it to change the shape of your piece. Measure and cut after softener has been applied, not before. It helps to put the veneer between books or something heavy and flat after applying softener. Be sure to use wax paper next to the veneer so you don't get anything stuck to it. The heat glue also changes the shape of the veneer. So be sure to measure and cut after both the softener and the glue have been applied. Not all veneers work well with this method. Some woods are dense and don't transfer heat from the iron very well so they never really adhere fully to the shell. This has only happened to me once, but it was a helpless feeling. Oak and bubinga worked well for me. Even an elm burl. I've heard that waterfall bubinga can be difficult, but that's second hand info. michael watkins: Your beech veneer should go down nicely. I have done several types of veneer and really never had to use softener for flat grain woods, only burls, as they tend to buckle and crack when applied. I normally use regular pva wood glue and an iron for the flat veneers and a vacuum bag for burls. Unfortunately, I can only do snares in burl because my bag isn't big enough for the larger drums in the kit. JLee: In my short history of working with veneers, I can tell you that just using the iron on method works GREAT. Only problem I had was with the veneer itself - a mappa burl - as it cracked so easily. Had that not happened, the veneer would have gone on just fine - smooth and flat with no pockets at all. PDGood: Question for those who use vacuum bags - how does that not crush the shell? In fact, how does that work at all? I'm having trouble picturing how a bag goes over a shell and produces pressure on one side. This info would be much appreciated - I've only used heat glue. tbone: I build a plywood form for the inside of each shell to keep it from imploding (and I did implode one). There's also a method of having another bag inside the shell with a tube supplying air from the outside, equalizing the pressure & inflating - I built & tried that, but without success. Raven Drums: Yes, what Tom said pretty much covers it, however, there is another method with oversized bags that you can use which allows the bag to form around the shell both inside and out and is very effective. I now use this method on 14" diameter drums or larger. I had a few "pressure molds" implode on large drums and the forces at work can be a nightmare and serious health risk on these larger projects. HiString: 1st pic is my vacuum pump setup and the 2nd is a Tama tom under vacuum, the white bands are elastic bands which I use to hold things in place before placing in the vacuum bags.  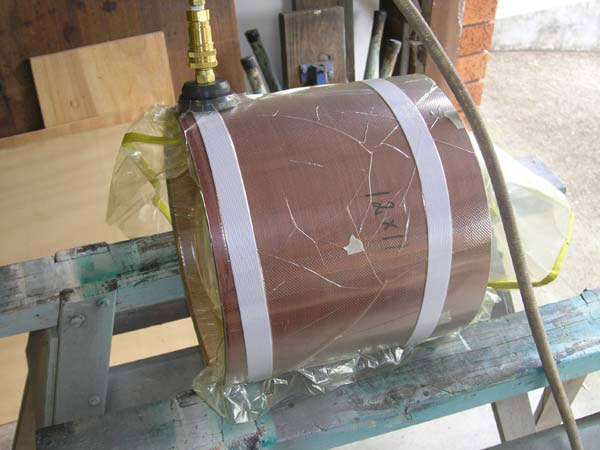 tbone: HiString that's cool; I assume there's some kind of form inside the drum to keep it from collapsing? HiString: I actually removed the supports from that particular shell because of other problems, this allowed the vac bag to pull inside the shell from both ends.........it ended up as tight as a bloody drumskin halfway down inside but normally I use mdf "end caps" that act as supports and also stop a re-occurence of the above situation. Veneer Glue tbone: The type of glue used affects the amount of resonance or tone lost in a shell when veneering. Contact glue is pretty soft & 'blankets' a shell, white & yellow glue, same to less degree, and urea resin glue is hard & brittle & when applied with a vacuum press, forces the veneer to become part of the shell, fusing the glue into both surfaces to become more like one. HiString: I agree totally re glue types, I wouldn't use "contact" adhesive for this kind of veneering...........I am currently using a high grade two part epoxy which is used in the composites and marine industries. Also I get veneer "fleeced" (paper backed) as this adds stability to the veneer, minimises any chance of the veneer splitting and restricts any chance of "bleed through" of the adhesive as there are unlikely to be any weak points left exposed in the veneer. tbone: I use a vacuum bag and urea resin glue. I always sandwich the veneer with another layer of either backing paper or another veneer. I lay a heating blacket over while vacuuming to cut the time down to 1 hour. After vacuum, I do edges & beds last cause I always manage to get some glue on them. HiString: A couple of other thing which may be of interest to you is that, at least with the epoxy I'm using, it is not necessary to use anywhere near full vacuum, just as long as there is sufficient "pressure" to hold the veneer down firmly and stop any movement. Also, I use a "medium speed" hardener which prolongs the availble time to work before putting the shells into the bag. gheeley: I totaly agree with tbone about the situation with glues, if you PVA or Contact the veneer inplace then it is essentialy working as a wrap, if you use pressure with the right adhesives then it does form as part of the shell. My own experiments with forming plywoods out of raw venners to make my own have taught me a lot about working with veneers & PRESSURE is the way to go for stability, they can be tricky to work with, especialy in non backed. if you want to work with veneers I suggest buying a veneering book, i use a book called "the complete manual of wood veneering" & it has been essential as well as a interesting read. trickg: What about using good ol contact cement and a roller? Also, if I do decide to go this route, will I have to strip the outer lacquer that is currently on the shell, or can I simply paste the veneer right over the top of what is already there? tbone: Contact cement's not the best for veneering, it IS soft & the shell will no longer have the tone it had previously. It'll look good, just not as resonant. Also, any sealer finish should be removed or at least really roughed up (150 grit) before using any kind of glue. Also, the back side of wraps should be roughed up before gluing. trickg: Is there any other kind of glue that I could use on veneer where I could still apply it with a roller? tbone: Wish there was. All the glues can be applied with a roller, just that all except the urea resin dries soft & pliable; the resin gets very hard & brittle. Besides that being the problem, it's also a matter of how much glue is left between the surfaces, which is why a veneer bag is pretty efficient - there's so much pressure that the amount of glue is miniscule compared to using a brush or roller and just pressing & rolling. When the shell is in the vacuum bag, it seems like it's going to explode (implode actually) cause there's so much pressure EVERYWHERE! So every square inch is 'clamped' to the hilt. And the thin sheet of glue left is fused into both surfaces. I'm sure plenty of people DON'T use the vacuum method & are happy with the results, I'd just rather go the whole 9 yards. HiString: just for the sake of illustrating a point, the following pic shows two "test pieces" under vacuum........one is a "backed" Padouk veneer and the other an "unbacked" Jarrah on mdf bases.........notice the bleed through around the edges and in the centre of the "unbacked" veneer. I had also measured the thickness of the samples and bases before gluing, a later measurement showed the adhesive had only added about .0015" to the total thickness. 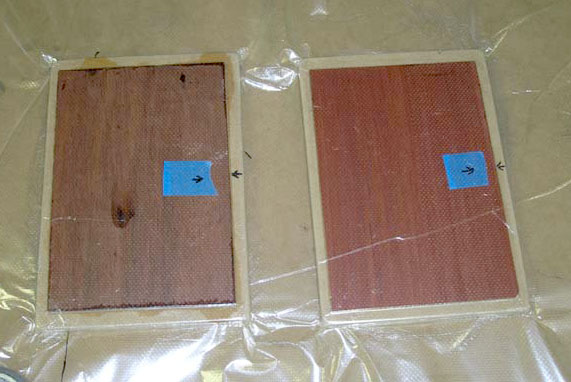 Mountainhick's Veneer Project mountainhick: As an interlude to get my veneering chops together for an 18 bass drum, I started working on a Slingerland snare shell... (After much prep work) I sanded down the outer ply: 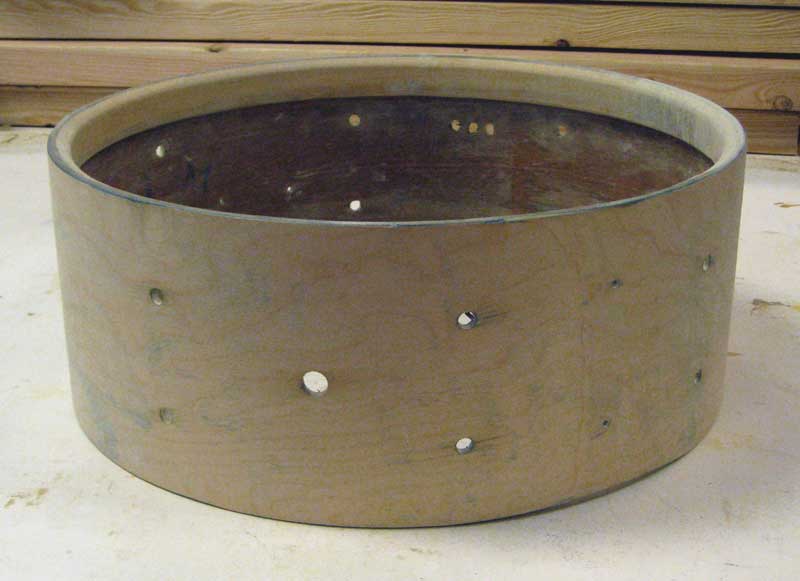
Worked on fitting the veneer and cutting the joint: 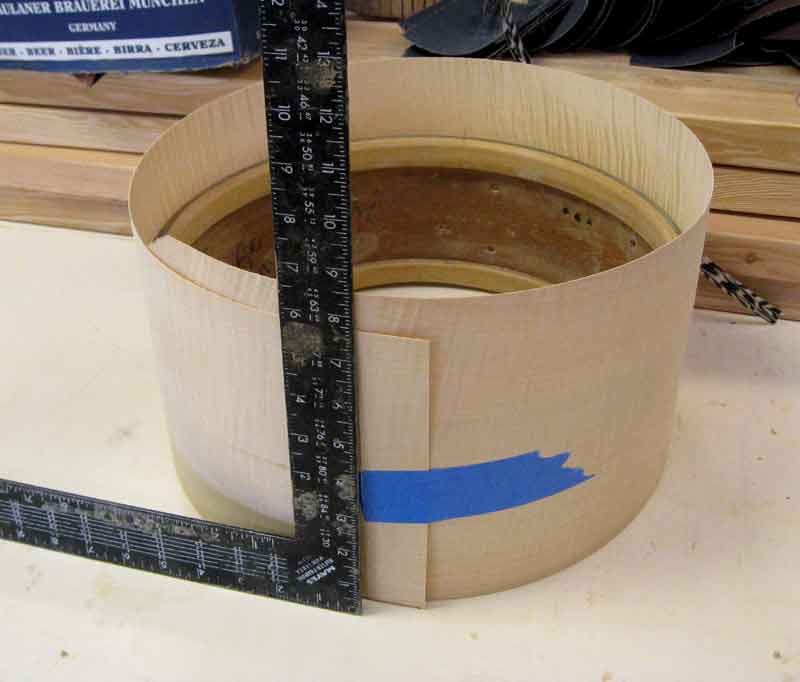
Applied glue to the shell: 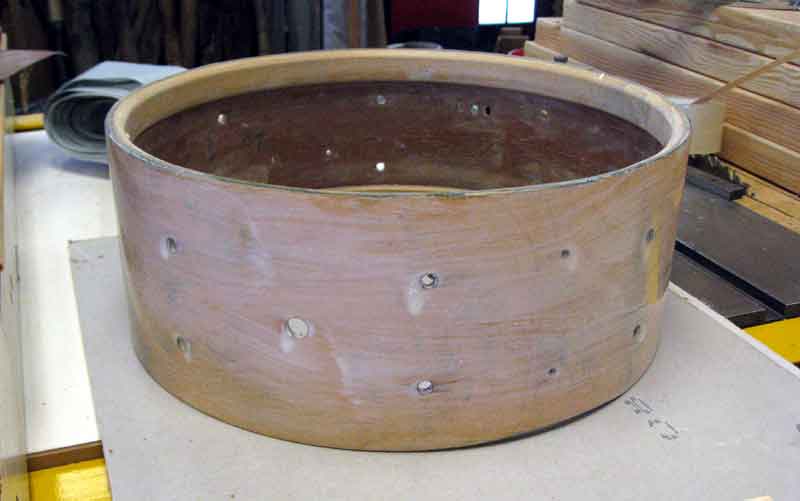
Applied glue to the veneer. I tried using the caulk tube as a roller to evenly spread the glue but it was too slippery and did not work well at all, I ended up just brushing the glue on with a nylon bristle paintbrush... worked fine: 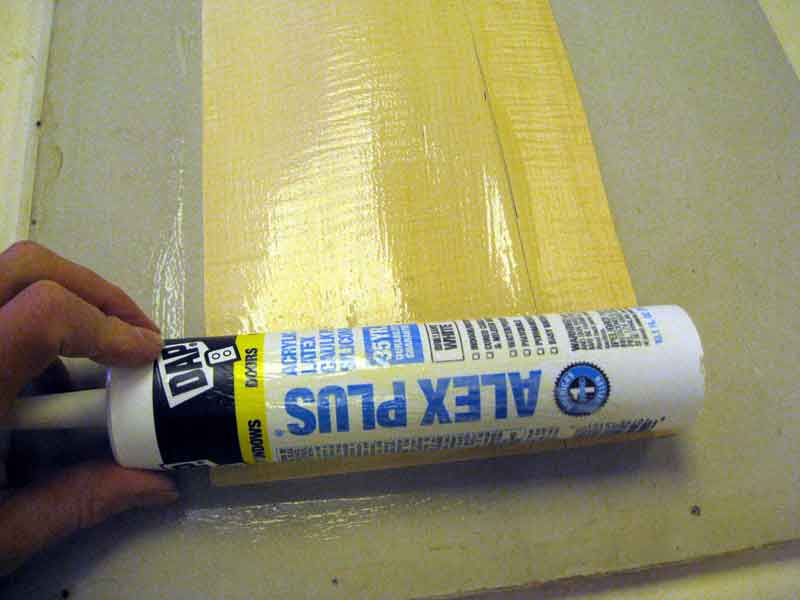
Wrapped the veneer on and taped the joint: 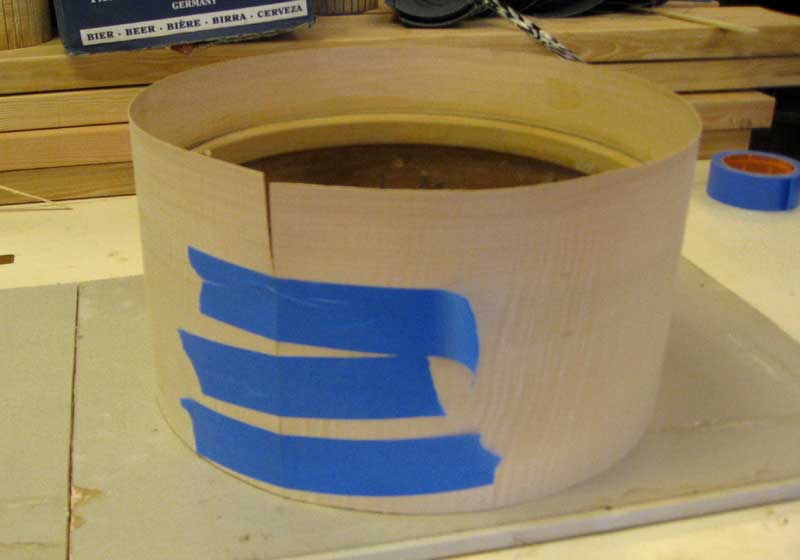
Then trimmed the excess width of the veneer off, and used nylon fabric and duct tape manually wrapped very tightly as the "clamping" scheme. 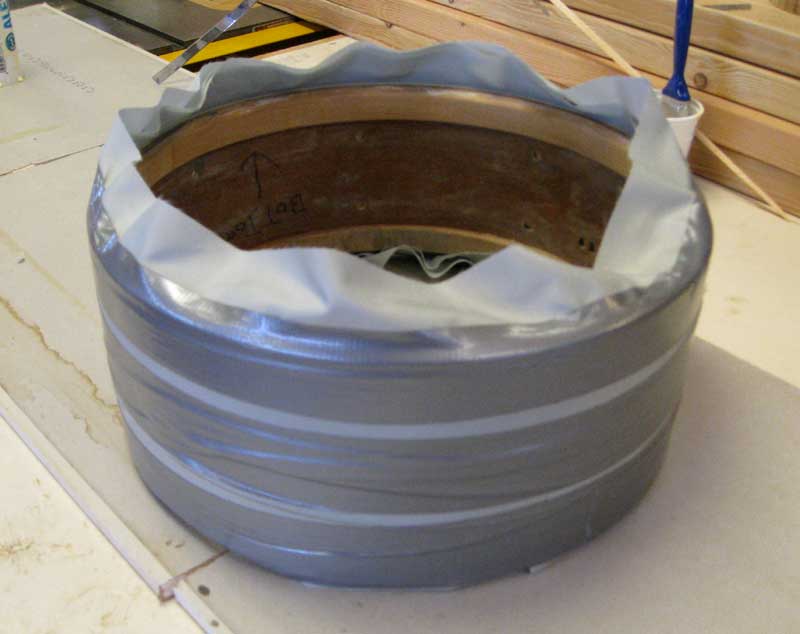
Because the shell has a bit of a curve towards the edges, after taking off the wrap, there was a bit of gap along both edges. I reapplied some glue into the gaps and rewrapped more tightly around the edges. The glue is drying now. Progress. I had a little weirdness with the veneer at one edge and had to fill it a couple times with an epoxy filler so it was totally solid. Otherwise, the veneer is solid. I worked the edges and here it is ready to recut the holes and finish: 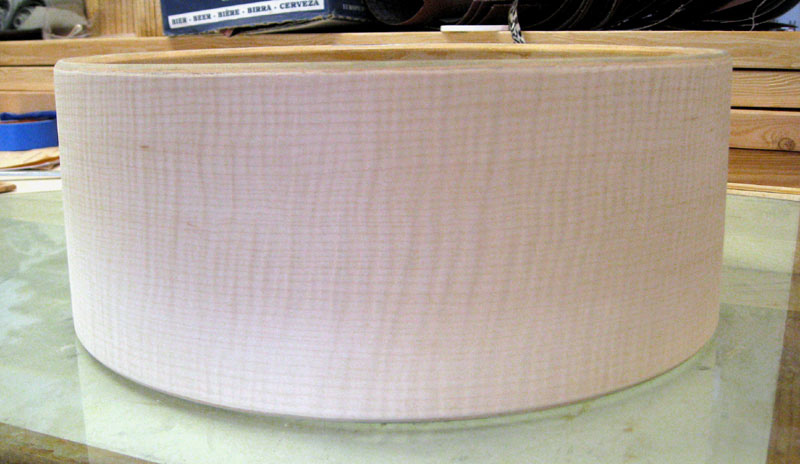
Snare is done! 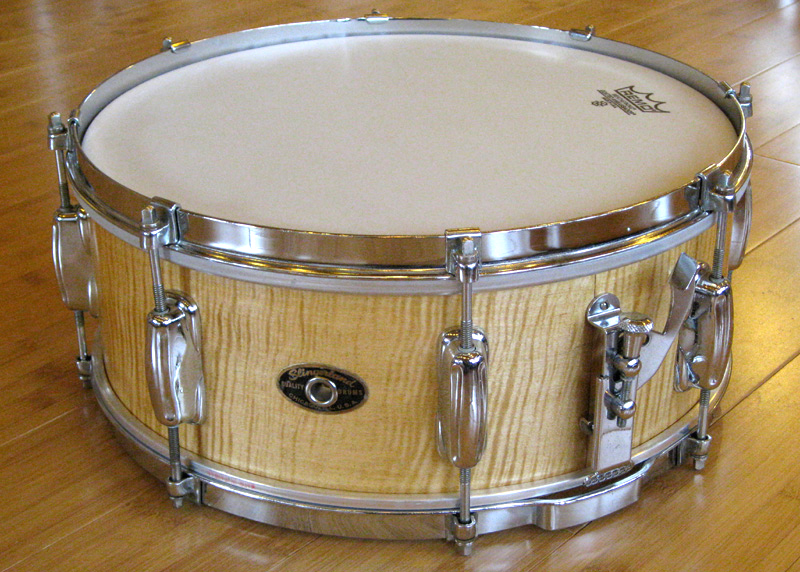
I veneered the 18 bass drum shell today. First I jointed the veneer and joined the seam with tape. Here's the glue side: 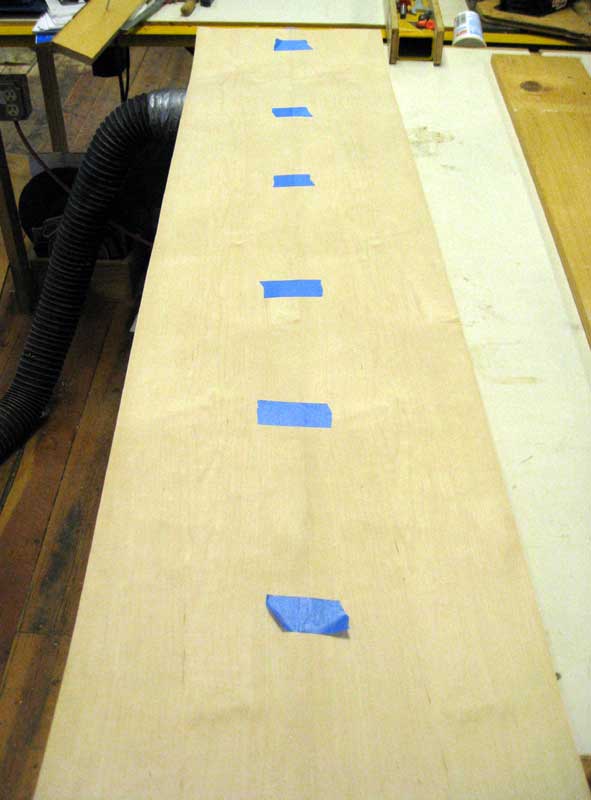
Then flipped it over and taped the outside prior to removing the tape on the glue side: 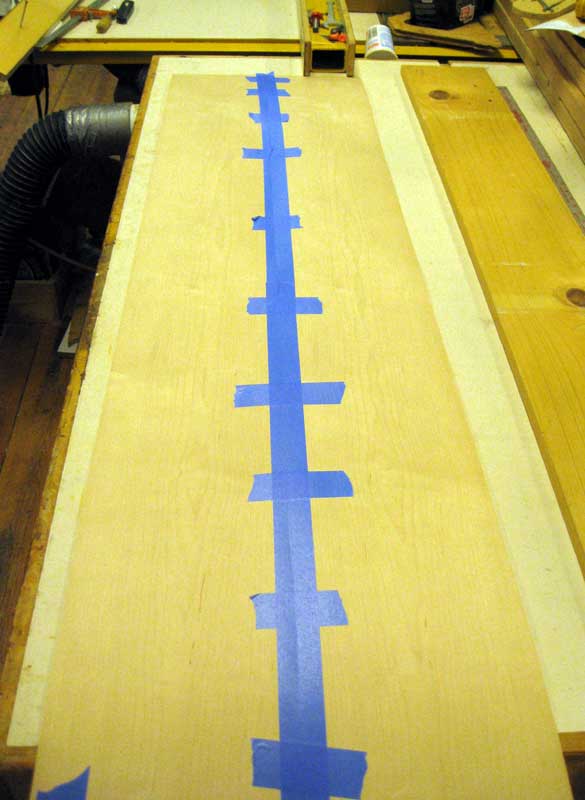
The gluing operation was a bit demanding and I had no time once glue was applied to take any pics until the veneer was fully wrapped onto the shell and secured. I used the nylon fabric strips again, but found it was significantly harder than the smaller snare drum to get it all done quickly. I added some duct tape and packing tape around the edges to hopefully get a good bond. I think that maybe rubber inner tube material would work better than the fabric strips I am using. 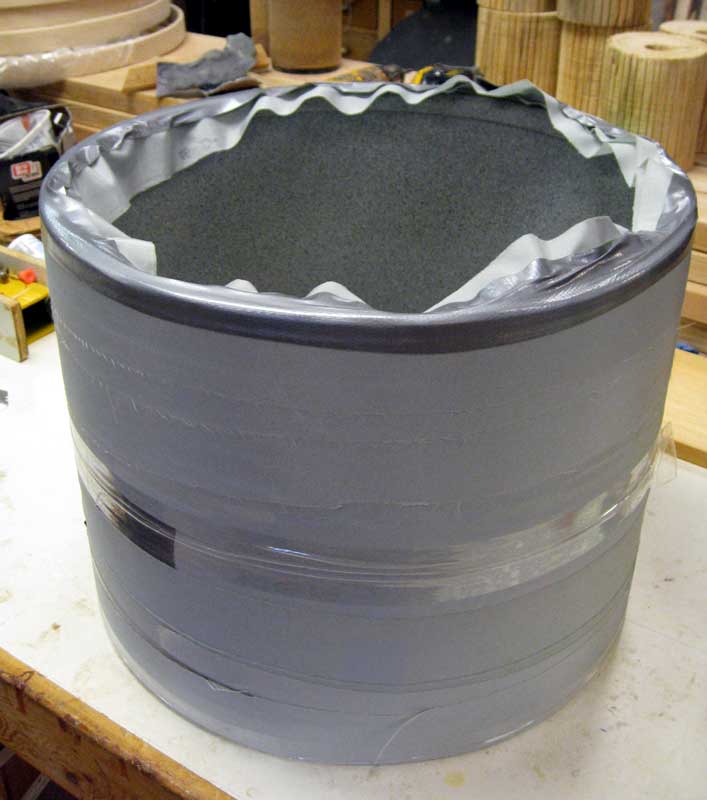
Most of the veneer job came out well: 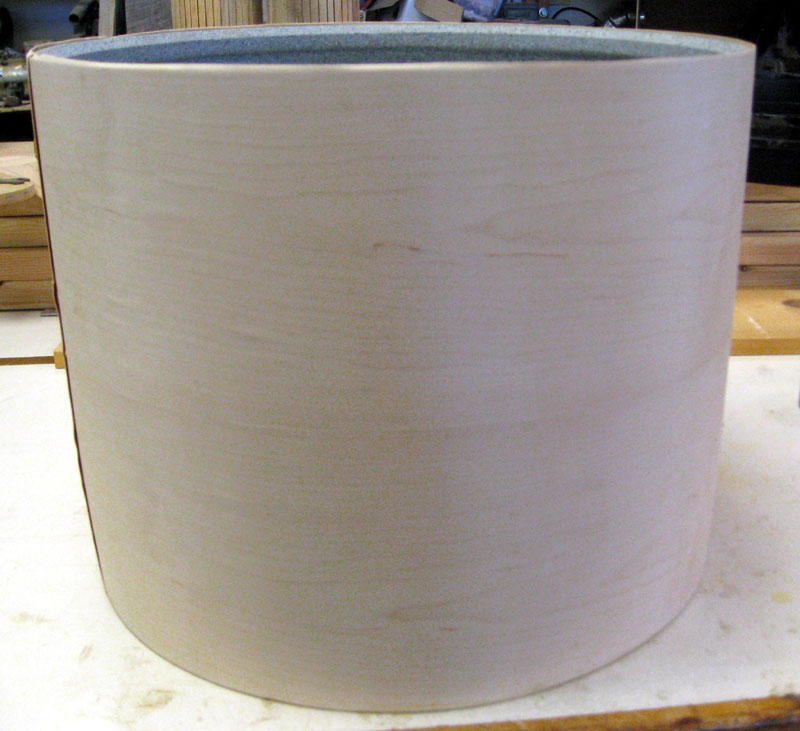
Except Arrgh!!! I didn't think through the sequence well enough and ended up with a messed up joint. It became much worse as I tried to fix it. After attempts to delaminate the veneer from the shell with heat from a hot iron so I could trim and get the edge to match, some small splits turned major. I figured if I keep trying to repair the edges as is they will only get worse. So two choices: 1: sand it all off again and re-veneer 2: sand off that portion of veneer and lay on a patch. I am opting for the patch. I figure it will look OK when finished and I'll just put it on the bottom of the drum. Here is the messed up joint after heating,with lines drawn to refer to while sanding of the veneer: 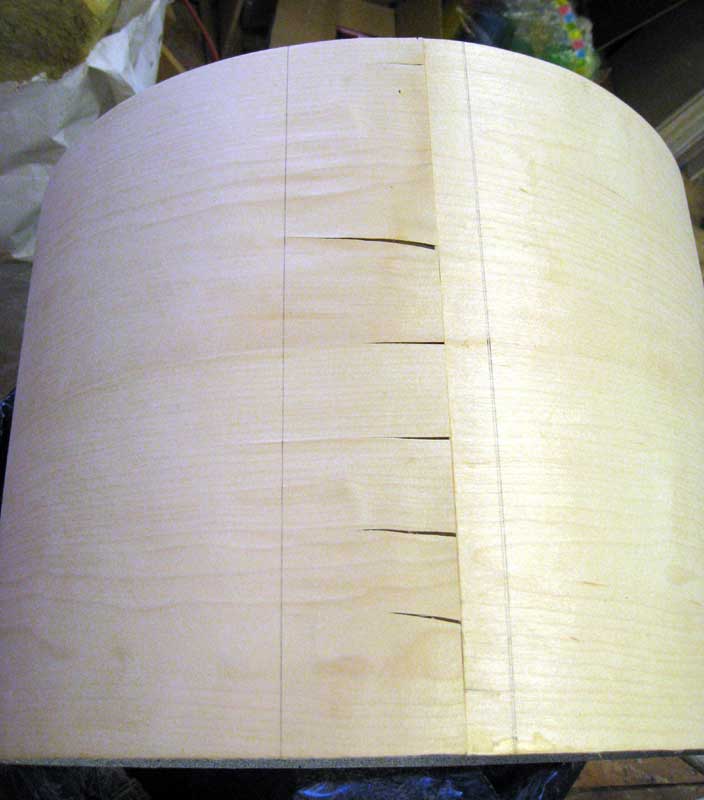
Here is the patch ready to go: 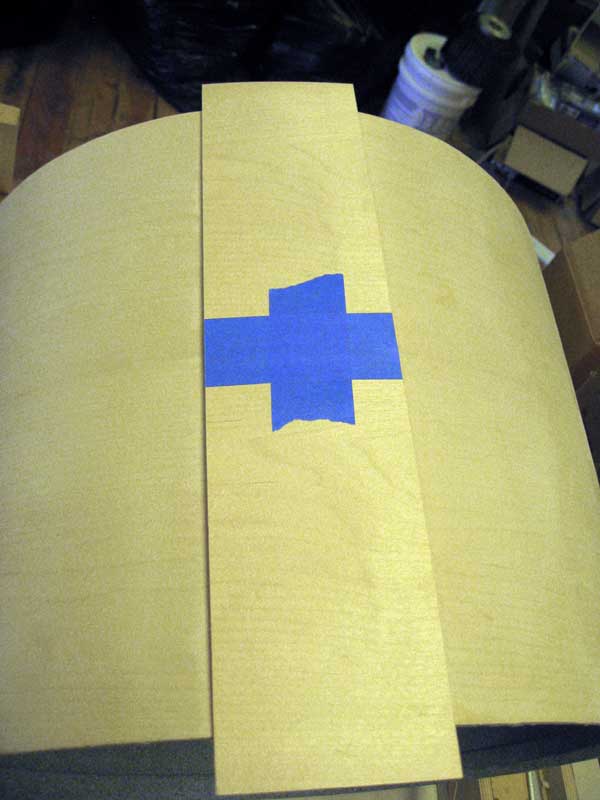
In retrospect, I realize I should have done a couple things differently: 1: When first gluing the veneer to the shell, leave about 1 inch of the veneer unglued along the edges. That way, I could trim the joint perfectly with a straight edge and knife, then brush some glue underneath the edges and glue them down for a clean perfect joint line. 2: The splits started when I was wrapping the veneer around the edge with the nylon strips. I could have prevented the splits by taping with veneer tape across the grain along the entire edge to reinforce it. And learned the hard way: Heat on veneer like this makes it shrink and split. Veneer Softener PDGood: Does anyone know a formula for making veneer softener? randyb: Tbone got me to make a mixture of1/3 water, 1/3 carpenters glue, 1/3 glycol. Veneer Over Veneer lameduck: Does anyone have experience applying a veneer over an old veneer and if so how did it turn out? I've read that it's not an advisable method but is it really that harmful? ZrowBD: Plyshells are made of veneers glued to each other aren't they? koko: Normaly a shell is underzised, as far as I could find out it varies from 1/15 to 3/16 undersize. Before you go, calculate the end result and make sure the head will still slide over the shell. drumwerx: If they are just maple plys and are still undersize then it will be no problem. I do this all the time with all of my drums. The prep work is easy just sand them with rough sand paper so it can have glue bond to it. Then glue the new veneer on the shell. If they have never had anything on them and they are just stained or painted then the shell will still have enough room to add veneer to them. tbone: Brittle veneer is risky, so I back most of my veneers with a 2nd ply. You can use another veneer in a 90° position to the original. Because I don't like 2 thicknesses of veneer, I back mine with a fleece I buy by the roll from veneersystems.com. It's not on their website, so you have to call them. I'm not sure how the 2ply or veneer/fleece methods would work with the iron on process cause I only use the vacuum bag system. I do recommend the veneer flattener sauce, though. Liming PDGood: (to Coco) What do you mean by limed? What's involved in the process? |
|
Coco: It's the white in the grain. The process is basically filling in the grain with a white lime paste and then rubbing down and wiping off the excess. I am a cabinet maker and we use it on home furniture such as beds and tables. ...scratched out, sealed, limed, sprayed, cut back again and top coated - that's the full process of liming. PDGood: I'm not quite clear on the line - it has been scratched out, sealed, limed, sprayed, cut back again and top coated. And �what is the purpose of sealing before liming? Seems like that would fill the pores and leave less room for the lime. And what is meant by - cut back again? Sorry to be so ingorant of the ways of the cabinet maker. |
|
�
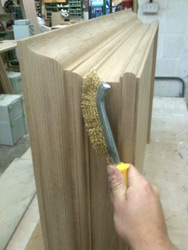
|
�
|
Coco: Scrathed out basically means taking out the softer grain with a wire brush, and sealing is simply a light coat of lacquer to stop the lime rubbing into wood where you would not want it to go. It is such a light coat that to fill the grain out would be near on impossible. I am pretty positive you could dye this (the white lime), maybe even with something as simple as food dye! Though I have a collection on concentrated lacquer dyes that I am sure would work, thanks for all the feedback, and I might just give dying the lime a go. I recently finished a project in oak that was limed, that's what inspired me to make this drum. I am a fan, but I agree it is very easy to go over the top with it. Cutting back is just the term I use for sanding for another coat of lacquer, normally with about 320 on a lower sheened lacquer. � J.Richard: Liming is similar to Pickling, where you use an oil base paint to fill in the pores of grained wood for a variety of colored finishes. � |