
|
|
|
|
|
|
|
|
|
|
|
Inlay 101 - by Seth Adolcourt So I've added inlay to the list of drum jigs I've made, and after all was said and done, I went the simplest route possible. The jig is little more than 2 stands and a board, to which I've screwed a Bosch Colt to the backside. The knob on the left covers an oversized hole, while the knob on the right is a 3/8" through hole, and acts as the pivot. 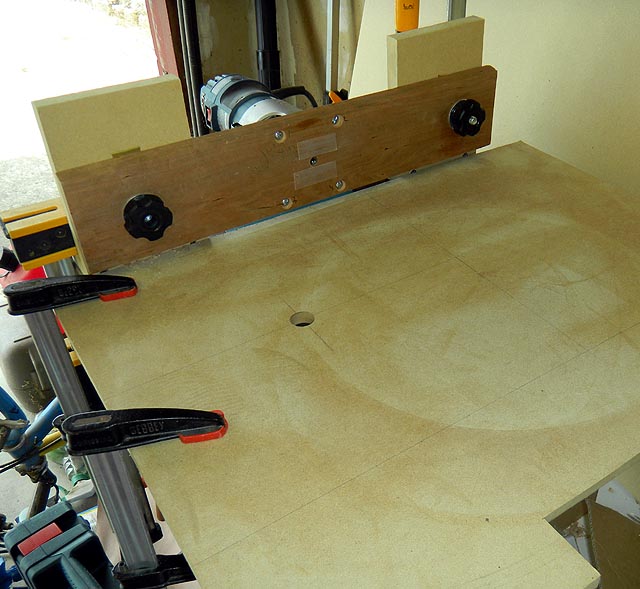 A view of the back. 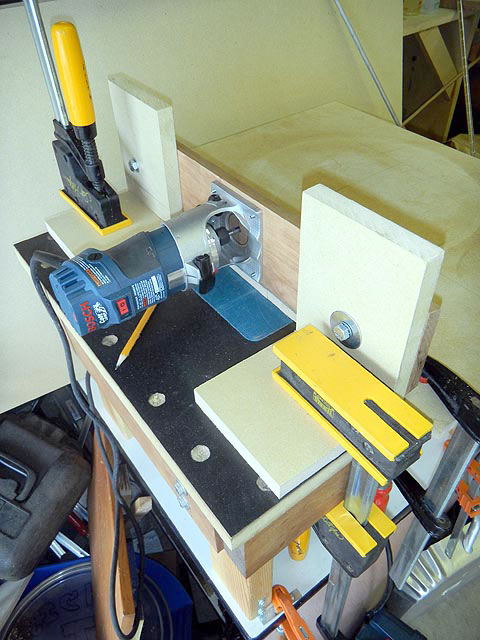 I've mounted the Bosch so the fine adjust knob is in easy reach. 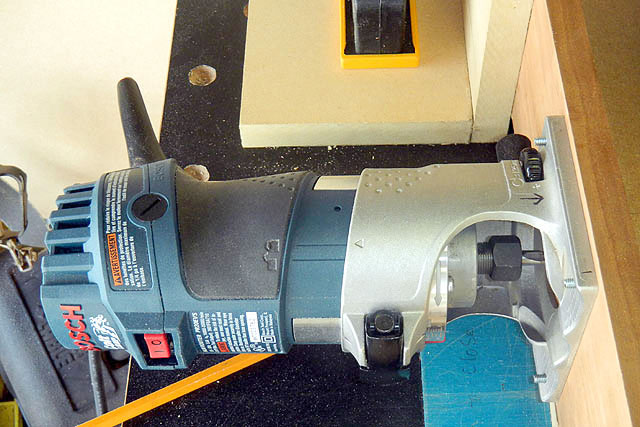 The two lengths of tape above and below the router bit are UHMW (ultra high molecular weight) tape, which is plastic, and very slippery. This should reduce scratches when the shell contacts the fence, and the shell should glide easily. A piece of cherry is used to test the setup. 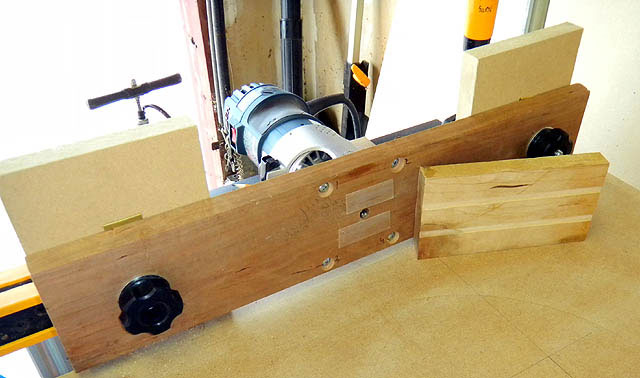 In laying out the inlay, I chose to have a 3/4" gap between the two bands. The shiny top coat is spray shellac, and it will be sanded, anyway. This is not the final top coat. 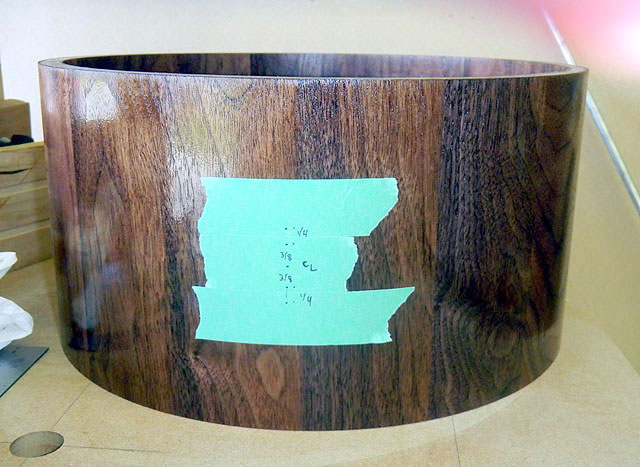 I'm dawdling here. I'm actually consumed by worry, wondering if I've missed anything. I'd hate to gack a shell....aw, just cut the shell, already! 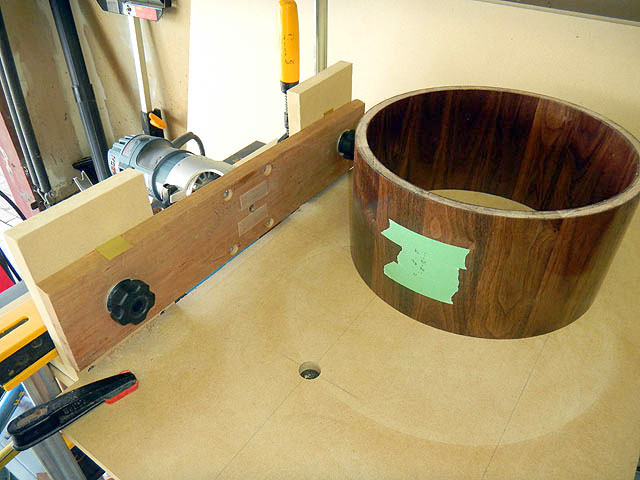 It's really easy to do. Why did I fear it? First one done. 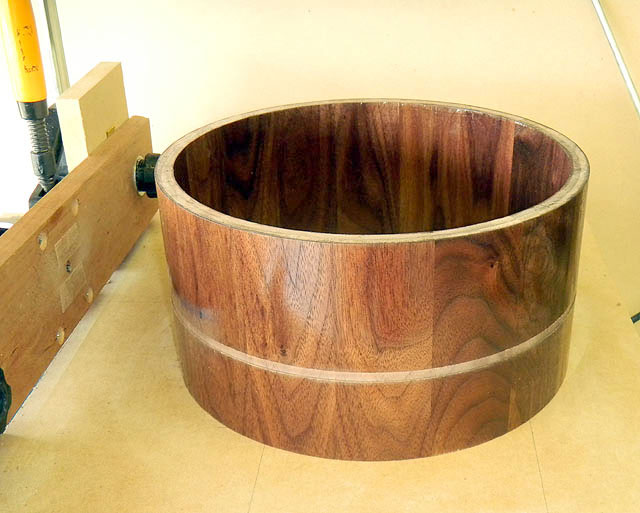 Flip the shell, run it again. Both lines of inlay will be exactly the same distance from the bearing edge. I knew the inlay was too wide for the 1/4" channel made by the router bit, so loosening the left side knob, I gently tapped the fence, moving the router down by juuuust a little bit, which will widen the channel. 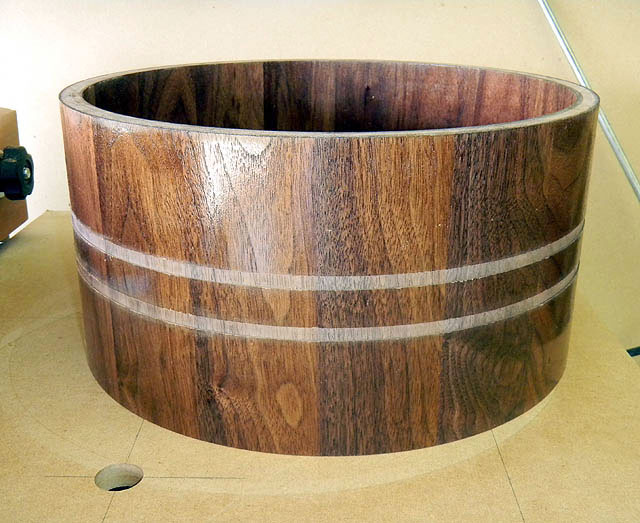 Several dry fits later, the banding fits snugly, but not too tight, in the channel. For the few parts of the inlay that didn't quite fit, a touch of 220 sand paper along the inlay's edge fix the fatness. Nothing is glued yet, so no worries that the bandings are not aligned to each other. It's just a dry fit. 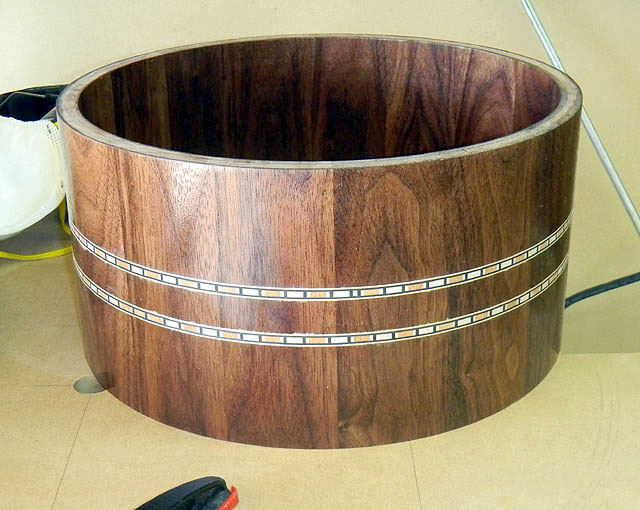 Does anyone have an inlay stretcher? I mean, circumference x pi will tell you mathematically how much inlay you need, but you can only buy 36" lengths at Woodcraft, not 48". So now...I need to spend $17 more dollars for 3" inches worth of inlay. That's drum building! 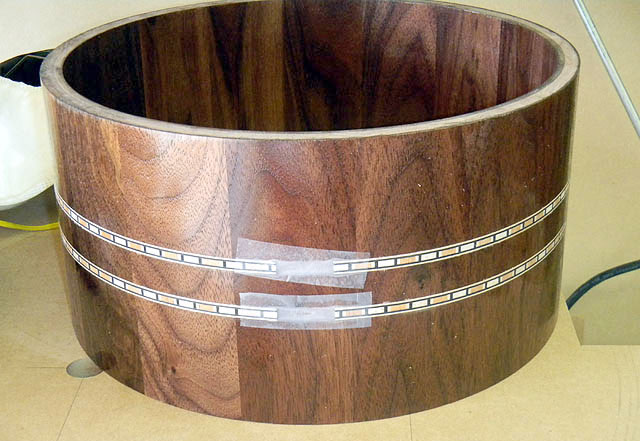 I did a double check of the measurements, I'm good with the standard configuration, the 2.5" hole to hole spacing. The width of the whole banding section is 1.25", and that gives me 1/4" gap to each lug foot, which consumes the entire 1.75" gap between the feet. |foot|.25 gap|inlay|.75 gap|inlay|.25 gap|foot| But that's what I like about custom lug manufacturers - choices and modifications are totally available. Yeah, well a screeching halt on the inlay. No surprises that wood products have variations to them; that's just a given. However, the other tube of the same inlay at Woodcraft is 1/64" narrower than what's on the shell right now. The Bosch did such a nice job on the groove, that 1/64" gap is noticeable! Bummer. So I have an email into Sauers and Company (www.sveneers.com), see if they can help match out of their warehouse. Else, I received a tip to go to www.inlaybanding.com. Guy is based in North Carolina, and though the web site is simplistic, the inlay he offers is really nice. The back up plan is to widen the inlay to 5\16". (Later) There is hope. Sauers and Co. replied, they have replacement inlays shipping in the mail. Stay tuned! (Continuing...) I had spotted the manufacturer's joint, where shorter pieces of inlay were stuck together to fill out the 36" long strip. I had every intention of cutting out the defect. Please use your sharp eyes to see if I remembered to do it. Hint, bottom row, right of center. 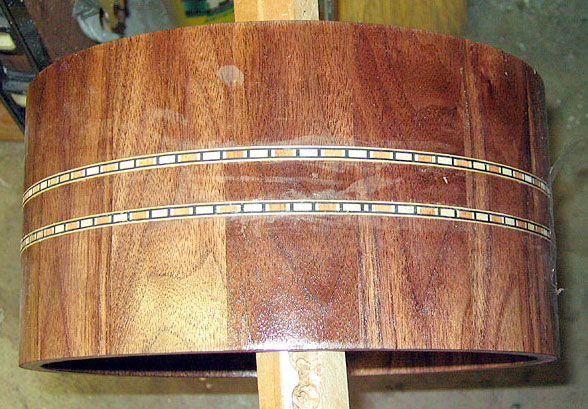 And here, too, top row, way left. What it means is...in some spots, the pattern is perfectly lined up between the two rows of inlay. But in other spots, the pattern has shifted, because of the manufacturer's joint. Epic fail. 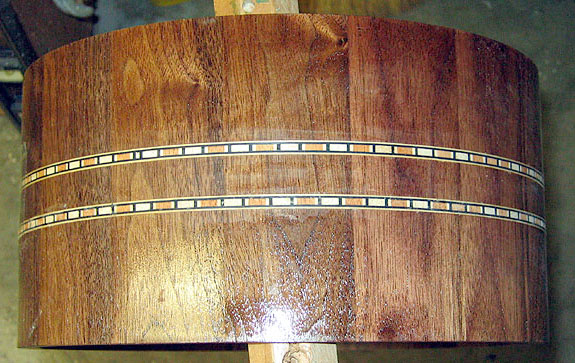 The other beast was gluing. I had a plan, but the plan sucked. I used Titebond Trim and Molding glue, which is very, very thick, and dries very, very quickly. Very quickly. The biggest issue was the super tight machine fit of the inlay into the channel - too tight. So when the glue wetted the inlay, it swelled, and it was enormously difficult to seat all the way. So I had to pull off the inlay, scrape off the glue, scrape the glue out of the channel, scrape the sides of the inlay, then try again. This time, I used good 'ol T3, which was hugely better. One thing that did go right was using a simple card scraper to level the inlay. My plan was to shellac over the tung oil, and if I scratched the shellac, I'd simply sand. Good plan, but in the effort of leveling the inlay (which also scraped away the glue blobs, smears and wotnot), I scraped away all the shellac. I need a new plan. Here is the results of the scraper. 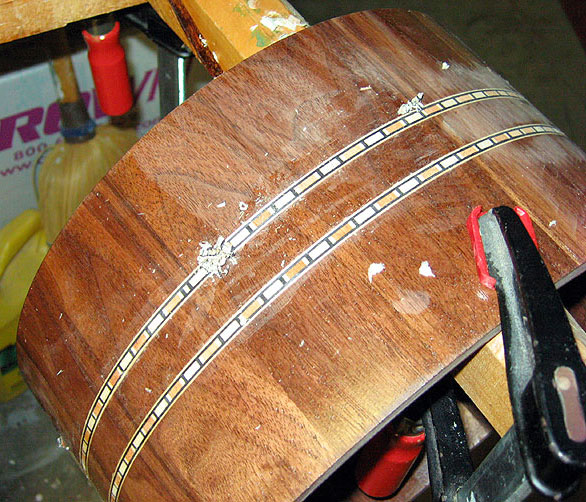 Ready for sanding. 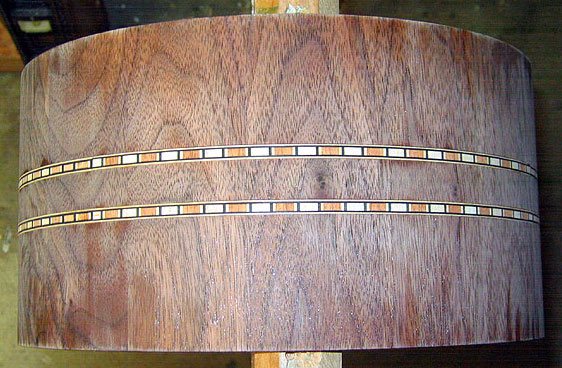 Sanded, and a new coat of Waterlox tung oil. I'll give it one more coat of oil, then a couple coats of shellac. The ultimate fix will be to route away the inlay, and put in new inlay. No need to go to town finishing the shell when I'm only going to put sandpaper to it again. Learned a lot, and that's sometimes the best thing to come out from a disaster. 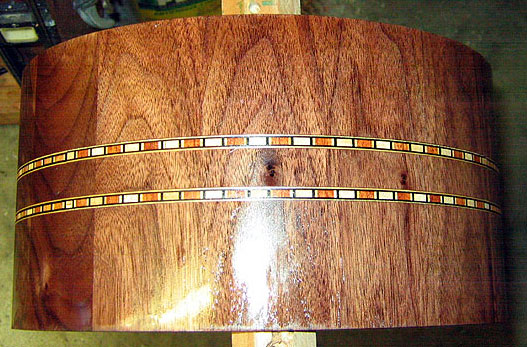 I set up the jig again. Once more into the breach! This time, I'm using a 1/8" diameter down cut spiral bit, and not a 2 flute straight bit. 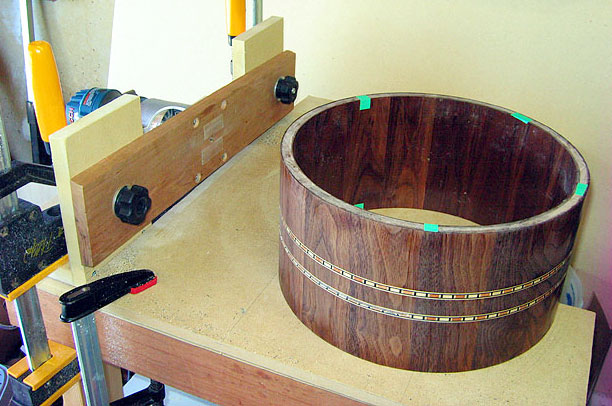 Here is a close up of removing the inlay. It's a simple jig, but very accurate. I just keep moving the swing arm until I get exactly to the edge. One issue - I'm also cutting glue, which heats up when cut, and sticks like crazy to the bit, so periodically, I have to unplug the machine and scrape off glue blobs with a toothpick. 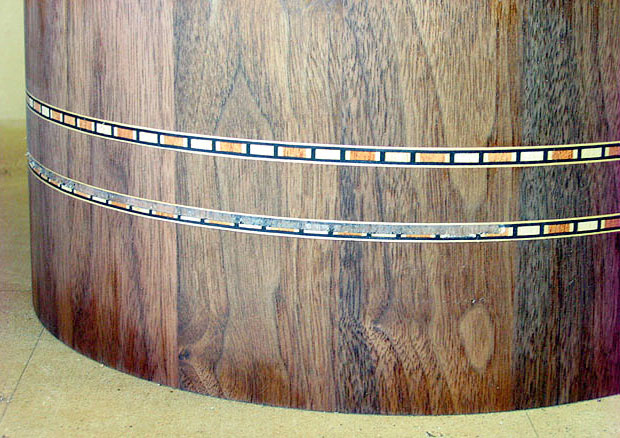 I had thought about removing only the sections where the inlay pattern was shifted, but I figured that a shortcut would have poor results. So, here I am cutting out ALL the inlay. 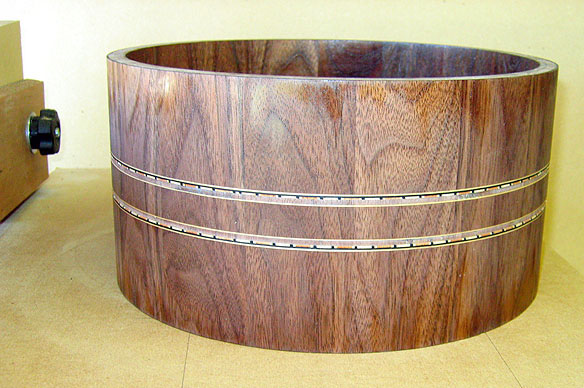 A few shifts of the swing arm, and all the original inlay is gone. 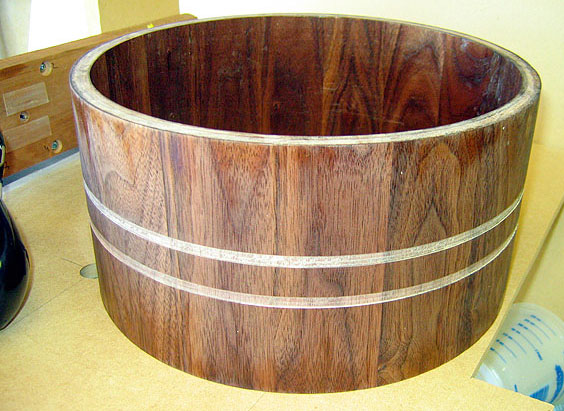 Here I go, dry fitting the new inlay. Same design, I like it. This time - smarter! I used the card scraper, seen on the left, to gently shave the inlay to fit the channel, and I'm not going for a super tight fit. If the inlay bound, I shaved. I wanted the inlay to fall into the channel, with the lightest of resistance. 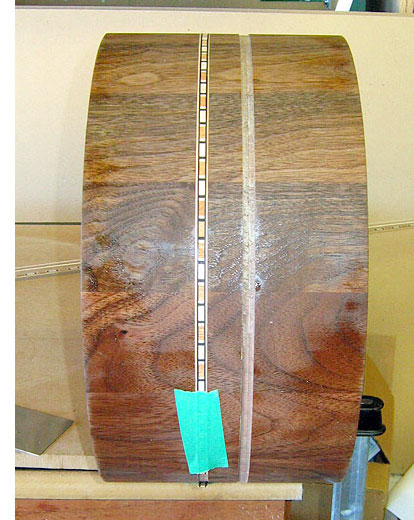 Really, take your time with inlay. What I'm noticing about Sauers brand of inlay is the two strips of inlay are usually mirrored pairs. So look for distinguishing traits to help ensure that the pattern exactly lines up between the top and bottom rows. Here, marked with the green tape, is a mistake by the manufacturer, who used a mahogany piece instead of a maple piece, breaking the pattern. I used this as my watermark to orientate the inlay strips to each other. 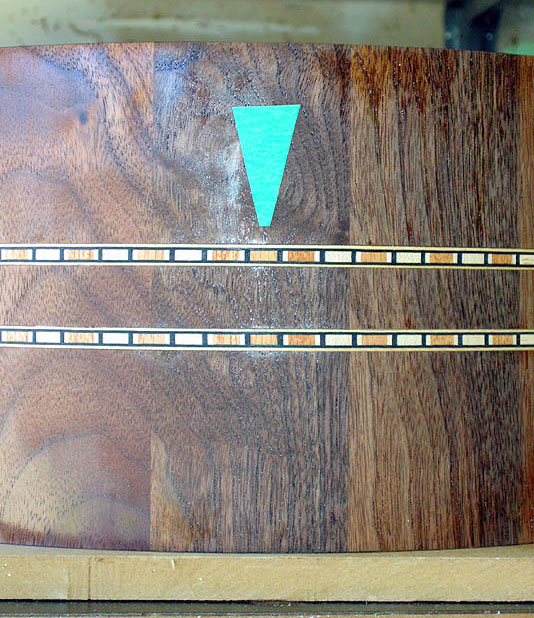 Now appearing at the main stage at Clamp-a-palooza - walnut! 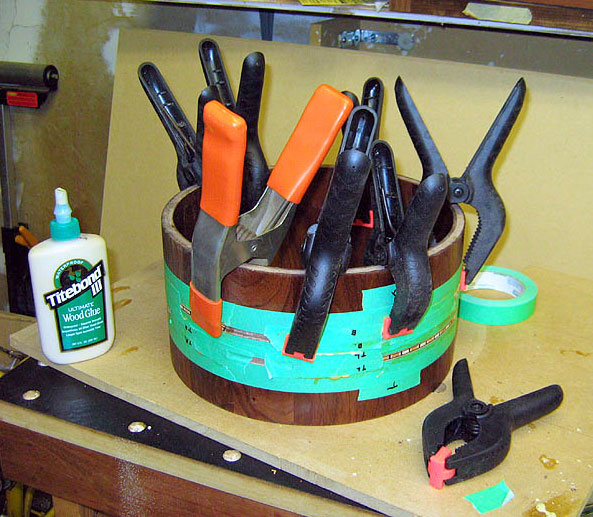 A 36" long inlay strip winds up shorter than 36", usually because you may have to snip the ends to terminate the strip at a point where the next piece can re-join the pattern. Here, the green arrows indicate where I had to re-connect the pattern. Generally, not too shabby. You may notice that the pattern breaks at the right arrow - no choice. Unless you're using a solid colored inlay, any pattern will have one portion that just doesn't match up. A clever person would mount the strainer right there. I used a 24 tooth Japanese pull saw to cut the inlay, and angled the cut to make a miniature scarf joint. I can get better, but that comes with practice. To level the inlay to the surface of the shell, I'm using a thin card scraper.  @#$%&! I found 3 sections that needed repair. This section, for whatever reason, did not sit down in the channel during glue up, so it was sitting proud the whole time. A sharp chisel cut out the offending section. I squared up the inlay, and cut a new section to fill in. Really and truly, it's better to find the problems before the top coat. These problems really made the day go longer. 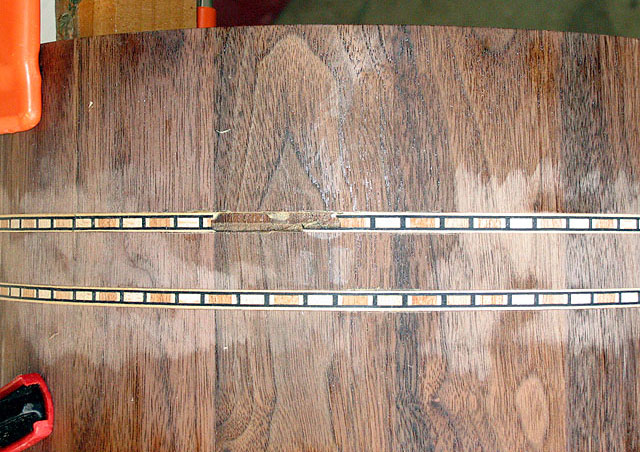 The second coat of tung oil. For all the drama, I'm liking the re-do. It's just a matter of experience. 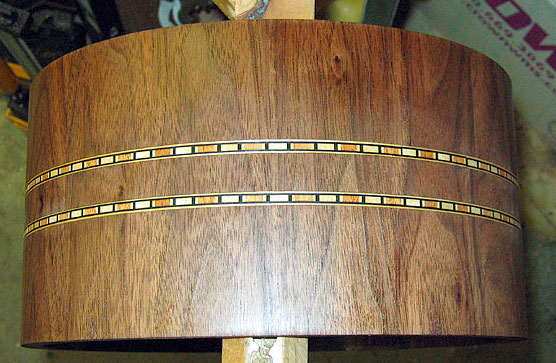 |