
|
|
Drum Kit Home
Conga DrumsThe BasicsDiscussions Mike Robertson's Tutorial |
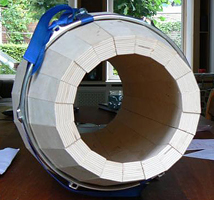
Photo courtesy of Koko |

Photo courtesy of Drums On Sale |
|
Mike Robertson's Tutorial This is a tutorial provided by Mike Robertson on his method of making the staves for a conga: Calculating the Stave Size To determine the width of the staves, take the outside diameter x pi (3.14159) and divide by the number of staves. To determine stave angles, you divide 360 by the number of staves and divide that by 2 (because the angle is being shared by the face of two staves). The diameter of the top is 10.5 and the diameter of the bottom port can be anything you want it to be that's aesthetically pleasing I think I went with 5 3/4 or half of what the top diameter is or close to 1/2. The top of the stave was 2 1/8" and the bottom 1 5/8". The bottom diameter can be anything you want it to be - more open or more closed. More open means louder the more closed it is the bigger the bass but not as loud. Not taking into account extremes of either. With that said, you have to have a board to start with that wide enough. What I mean is that you can't start with a board that's only 2 1/8" at the time of steaming because the width of the board wont be wide enough at the fattest part of the drum when you run it through the saw. I started with 4" boards and had maybe a 1/2 an inch left over at the fattest part to spare. I don't know of a way to determine the width of the staves in between the top and bottom before you cut it. I'm sure someone could do it. But its not necessary, as long you have the top and bottom widths correct the middle will take care of itself as you cut the stave on the table saw AS long as its wide enough to start with. Making a Steam Chamber The first picture is of the steam chamber, I put it togather with things I had at the house. There are many examples of steam boxes on the web. The one I made is from stuff I had at home. The water goes in an Anheuser-Busch half barrel. I would start with 5 gallons and that will reduce by half at the end of an hour. The heat is provided by a propane deep fryer burner. The steam comes out of the top of the half barrel and goes into a 6" stove pipe bridged by a small pipe that fits into the half barrel and the coffee can. The board to be steamed is placed inside the stove pipe and the steam is held in there by the coffee cans. If you use a half barrel, you will need to remove the tap by first removing its retaining spring. It WILL come out of there. Use an awl and a small hammer and start prying using another small screw driver to help pry. It can also be broken down further after it comes out. I reused the piece that came off of the tube. Look at the springs close to take the tube off and be sure to let all the pressure out of the barrel before you start taking the tap out. There could be pressure left in it even though it's empty! 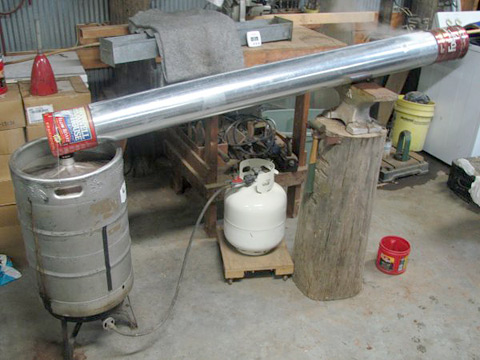 Making a Bending Box I took a piece of freezer wrapping paper and drew the shape I liked. Working within the limits of the depth of what my table saw can cut tilted at an 11 degree angle. From this I made the template I used to transfer to the boards I was using for the steaming jig. I guessed that the deflection or over bending of the steamed board to be about 3/4 of an inch over finished bend and it worked for this project. You must experiment with the wood you use. 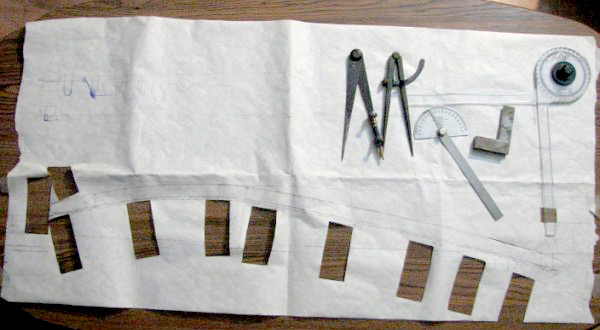 It is recommended that you steam an Oak board 1" thick as wide as your steam box for 1 hour. Oak has a very open grain. I'm steaming cherry for 1 hour 15 mins very closed grain. My boards are 4"x 41" wild cherry with a yield of a 30" stave you need the extra length while bending; it's very hard to bend short stuff. I put a 31" mark on it while it's still in the jig so they are all the same. Give your self some wiggle room. I want it to be 30" when itŐs done, 31" gives me 1/2" top and bottom to play with. This is the jig I made to bend them. After I started to put it together I figured out it was overly complicated and hard to put together, but it's rock steady and it works. Still working on making this part easier. I routed out the slots for the 2x4's. It has to be on the money or you get high spots in the stave that are unpleasant to work with later. Decide which part of the board you want showing before you put it in the steam box, look for the nicest grain patterns showing out. After you've steamed a piece, leave it in the jig till you need it for another one. 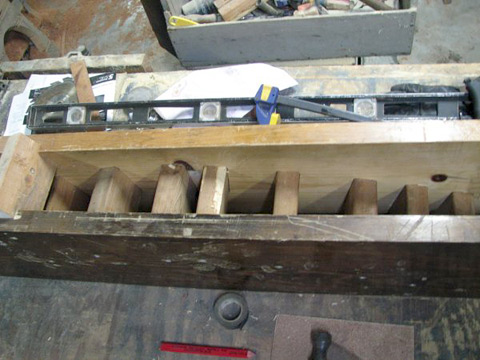 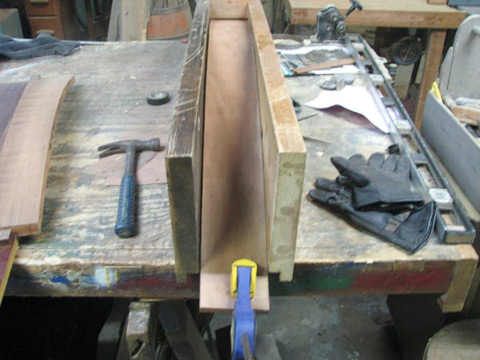 Mark and cut your steamed boards down to 31". Cutting the Staves After They've Been Steamed Mark the center of the length of the wood for your stave and figure out what size you want to make your conga. This one is going to be 10.5" diameter. So according to my hand tools shown in the pic above, the stave should be around 2-1/8" at top and 1-5/8" bottom. Depending on the drum you make, these numbers will be different. (This method is) assuming you have a table saw, I know many don't. Take any board you have that's wide enough to get two parts of the jig on it. Make a dissecting line from top to bottom of the stave at the 2-1/8 to 1-5/8". This is the line your going to line up 90 degrees to the blade of the table saw.  Top of the drum through the blade first.  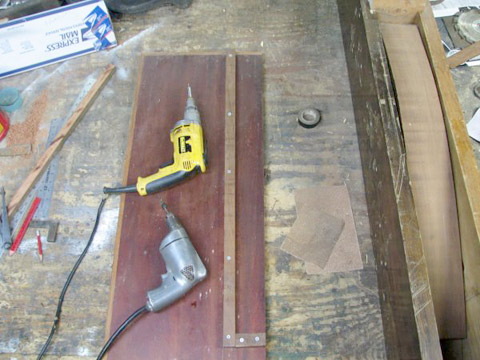 Wide at the top narrow at the bottom.  Be sure to leave the line because you will be running it through the jointer later. Some clamping of the piece while going through the saw will make this part easier. It does want to rise on you as you run it through the saw, when it hits the part that's not being cut all the way through.  It's ok if you don't cut all the way at this point. 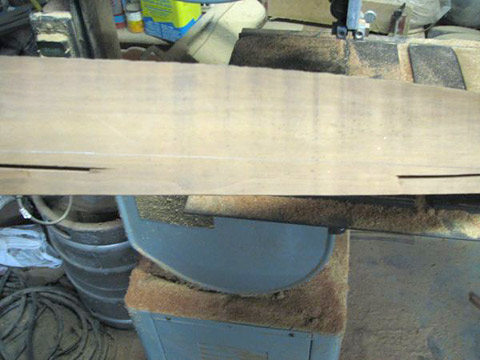 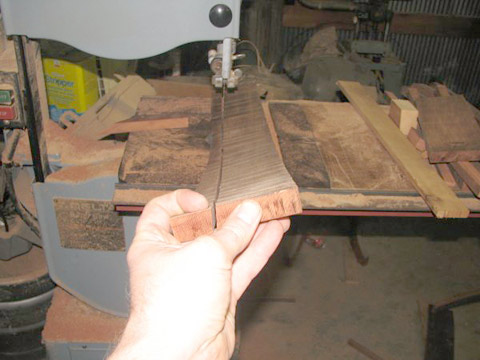 Just don't cut into the stave if you can help it. 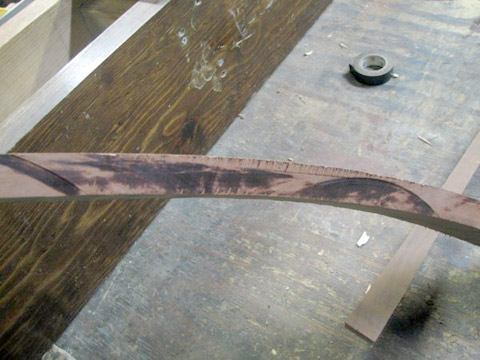 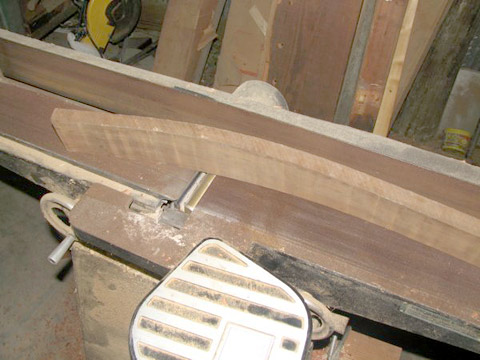 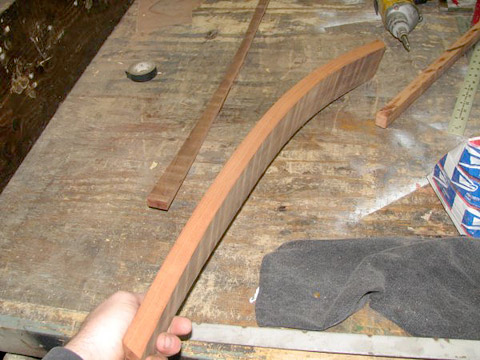 This is the bottom of the stave. This part will be going through the blade first now. 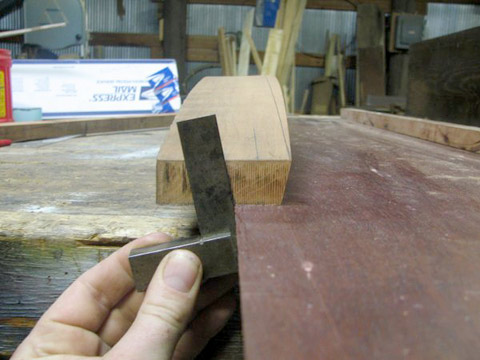 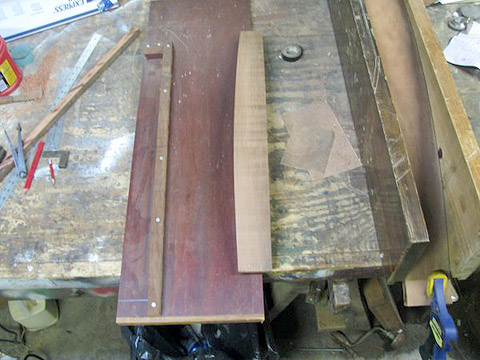 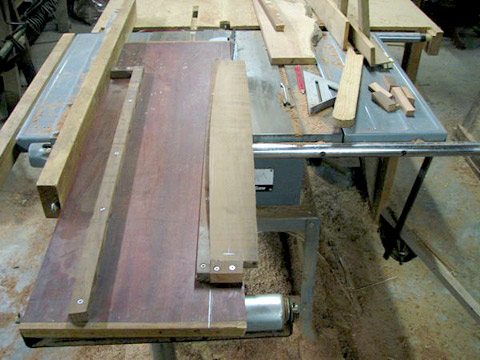 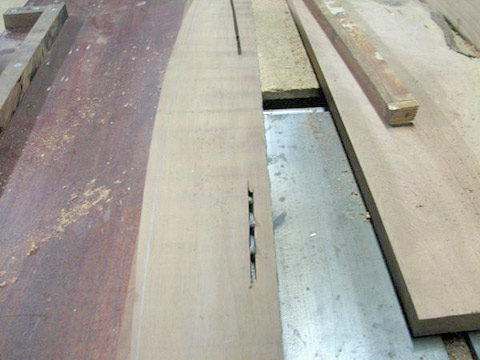 Remember to leave it fat so you can run it through the jointer. 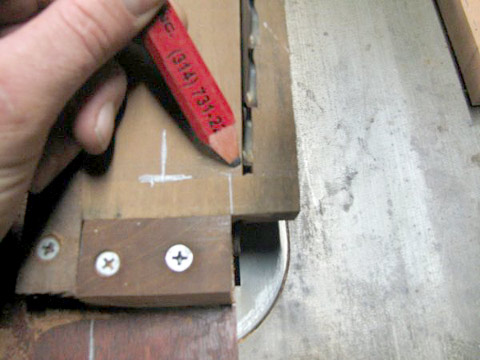 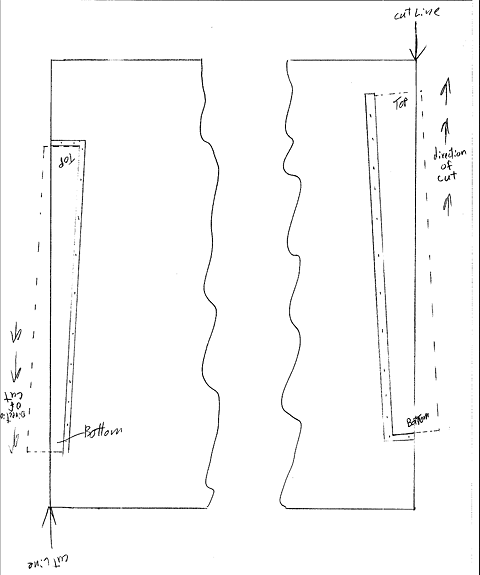 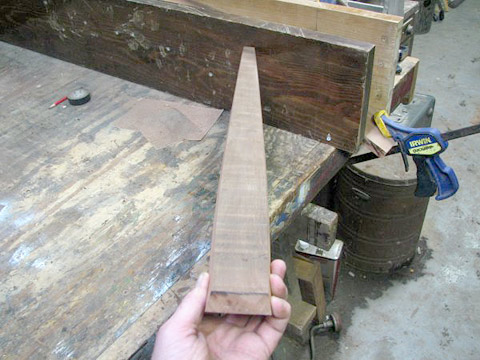 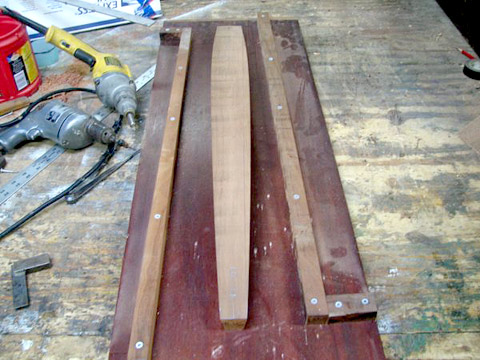 This according to my numbers will leave 10.5 outside dia. Head. 5.75 Inside dia. port at the bottom. Please fell free to run the numbers I'm sure someone will find something wrong with them. Remember I'm not using any cad software. Only hand held instruments that are subject to faults. But really if someone is looking that close at my drum they need to step back!!!! Here are photos of the half shell to demonstrate how this stave shape creates the conga/barrel effect. 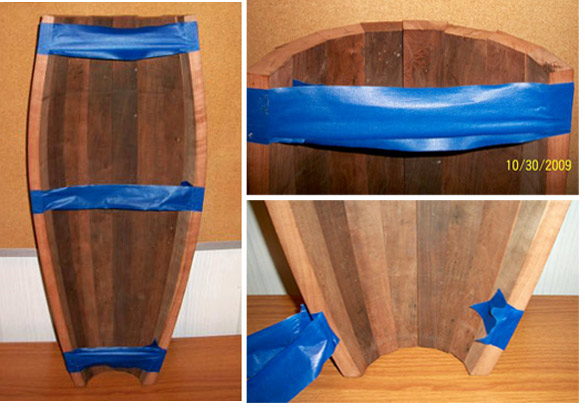 Drum be happy and don't hurt your hands Mike |